The debate surrounding how to cure resin prints has generated a lot of conflicts.
Some believe that over-curing resin prints may harm and destroy their durability.
Others maintain that properly curing resin prints necessitates being exposed to high quantities of UV radiation and heat.
In this post, we will be discussing the curing process in detail to get a better idea of whether or not you can over-cure resin prints.
Types of Light to Cure Resin
The fact is that there is a lot more study and testing to be done in order to figure out why some prints don’t hold up better than other prints when they are over-cured.
It is clear, nevertheless, that 3D resin curing takes place even after being exposed to UV rays and heat.
The greatest solution to these tough printing problems is to carefully observe resin prints as they cure and use necessary methods, such as utilizing a UV-a shield, to ensure your prints are properly cured.
When it comes to treating 3D printing materials, the strength of UV rays from the sun may actually decrease print structural integrity, making them more brittle with time.
The sun’s rays are far less intense than comparable curing boxes, so the process of curing naturally takes much longer in the sun than it does in other ways.
Finally, personal taste and accessible resources will determine whether you cure your prints in natural light or with an artificial light source.
Whatever technique you use, ensuring that your prints are completely dry is critical for obtaining the best results.
How to Get Rid of Resin Residue
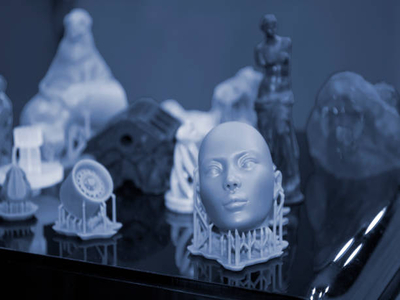
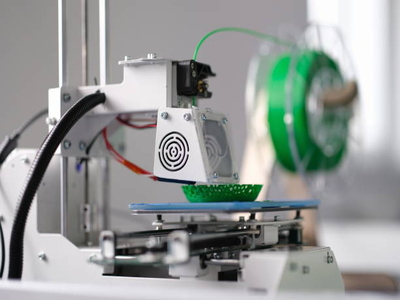
After resin prints have been manufactured, a process known as curing is required to improve and strengthen their structural integrity.
Resin is cured in the printer and the print is polymerized with UV light after being exposed to it.
The most popular post-curing technique is a heated UV treatment chamber, which reduces time and lowers costs.
The resin is heated to approximately 104 to 140 degrees Fahrenheit, resulting in a chemical reaction that increases the material’s physical properties.
This method is ideal for large-scale production since it can cure numerous prints at the same time while still maintaining quality.
Post-curing is a combination of light, heat, and time, depending on the resin type and desired final appearance.
While sunlight may be used to cure everything, the process will take longer. The larger the object, the longer it will take to fully cure with sunshine only.
The print is then exposed to UV light or heat to fully cure it, depending on the desired results.
During this time, as a result of UV radiation or heat, the resin hardens and becomes more durable.
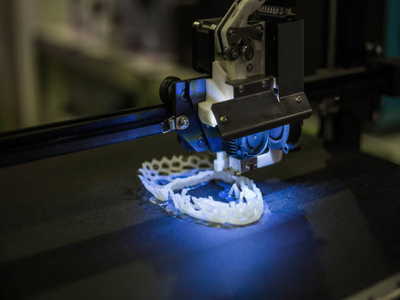
Using A UV Light To Cure Resin Prints
When 3D printer resin is exposed to UV radiation, it undergoes a physical transformation.
It will solidify and the hardening process will continue as long as it is illuminated by UV rays.
Because it shortens the curing time considerably, the use of a UV station is usually essential as both UV and heat have been investigated and revealed to improve resin print intensity.
Curing Stations
For industrial applications, Israeli firm Tamiyas sells a big cylinder unit that can accommodate many objects at once.
DIY 3D printers have shared their attempts to build with readily accessible supplies such as compact fluorescent bulbs in home aquariums.
Some users have even tried food dehydrators with long tubes and high-strength lamps.
Whether you go a DIY route or not, when utilizing a UV curing station, adequate ventilation is necessary due to the toxic vapors released during the curing process.
Let’s look at some cleaning and curing examples!
The video below illustrates how to clean and cure 3D resin prints in a few easy and quick steps:
Cure Time for a 3D Resin Print Under UV Light
The curing time for UV prints is determined by a variety of factors, including the size and density of the print, as well as the amount of UV radiation.
But, most prints will be cured in less than a minute in an ultraviolet curing chamber.
Ultimately, curing times vary depending on the thickness of the ink, as well as its opacity as transparent resins cure quicker than opaque resins since light passes through them more easily.
Likewise, if the print is thick or bulky, curing may take somewhat longer.
Remove The Molds From The Sun
Post-production curing by sunlight is a time-consuming and laborious process that might take up to an hour or more.
Additionally, you will have to move your print one way or another in order for it to get the same amount of sun.
You may also use a water bath to evenly distribute UV light, especially with the help of reflectors.
But, when using sunlight as a curing agent, there is always the danger of over-curing.
Heat, while essential for the curing process, may speed up the curing process, also leading to over-curing.
Although sunshine curing is typically used for small prints, it has certain limitations.
Because of those limitations, it is preferable to use an industrial UV cure oven for large prints or production runs.
Submerging Resin Prints
A water bath can shorten the curing stage as water aids in heat dissipation and light diffusion, helping speed up the overall curing process due to its uniformity.
If you’re going to cure your model using sunlight, a water bath is essential since direct sunlight might cause it to fracture.
When compared with other chemical approaches, oxygen has a negative impact on the rate of curing.
However, when utilizing a water bath, this effect is significantly reduced.
Isopropyl Alcohol is a Good Solvent
Isopropyl alcohol is not a cure but it is a cleaning solution.
After you have finished printing your model, it’s time to wash your resin model.
The washing stage takes place before the final curing step (which generally occurs in an external UV curing chamber).
The benefit of rinsing un-cured resin away is that it won’t cure and warp your print, and the curing time will be shortened as a result of removing the remaining un-cured resin.
It is also advised to wash your prints with gloves in a well-ventilated area, since breathing in isopropyl alcohol may be harmful.
After washing, allow your print to dry fully before proceeding to the next stage of curing.
Read More: How to Dry PETG Filament. Follow these steps for a painless process!
Conclusion
While UV lighting is a quick and effective way to cure resin prints, it can also be easy to over-cure your models if you are not careful.
To avoid over-curing, it is important to choose an appropriate curing time based on the size and density of your print and consider factors such as ambient temperature and humidity levels.
Articles You Might Want to Read
- How to Use a Heat Press Machine (EASY-Follow Guide)
- Best Printer for Notary Signing Agents
- Best Edible Printers for Cakes: Top Picks 2023