Among the limitless options of home interior design ideas available nowadays, we all want ours to stand out as a fitting representation of our unique selves.
A good idea to accomplish this mission would be to personalize the default designs we find in stores or to make something of our own with a customized design.
One way to do that is to incorporate one or more images you like into the decoration. For this, you will have to pick the photos or designs that you adore and they also work well with the interior pieces you already have in that area. Then you can just transfer those photos to glass with help of contact paper.
Wondering how to transfer photos to glass using contact paper? Let us walk you through the steps!
So, What Is Contact Paper?
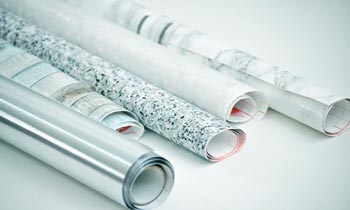
Contact paper is simply an adhesive paper that you can use to cover or line something. This affordable material comes with a sticky side and a decorated side. Since it is usually available as rolls, you can cut it into your preferred size with minimal effort.
Although we are going to be using it to transfer photos onto a glass surface, it is typically used for lining drawers or shelves in the kitchen and bathroom. This easy step adds a lot to the overall appeal of the interior by bringing some life into the inanimate furniture.
It is also used often at schools for creative projects and to manufacture certain stationary items like laptop skins or book covers.
The one we are going to use today is specifically made for transferring ink to glass. Other contact paper varieties can be used for stainless steel, vinyl and shelf liner.
How To Transfer Photos To Glass Using Contact Paper
Required Items:
- Glass container
- Printable transfer paper
- Photograph
- Color printer
- Rubbing alcohol
- Credit card (or driving license, gift cards)
- Warm water
- Flat surface (like a wooden table)
Steps:
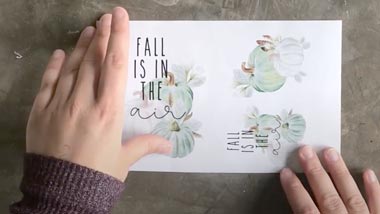
1. Prepare The Photo
First of all, prepare the image you want to transfer by printing it with a color laser printer. Once it is done, place the printed photo on the flat surface you have chosen to work on. We would recommend a wooden table with a smooth surface for this project.
2. Place Paper On Photo
Now place the contact paper aligning that photograph and cut it accordingly. Then put the paper over the photo so that it fully covers the image. That is why we would recommend printing the photo in a size whose width is smaller than that of the contact paper.
3. Remove Air Bubbles
When the paper is covering the image completely, take the credit card, driving license or gift card to get rid of potential air bubbles formed underneath.
Smooth out the paper so that these bubbles are eliminated and all of the ink from the photograph can reach it effectively. No need to rush this step since that might result in a failed transfer of ink.
4. Submerge In Warm Water
Then place this whole thing in a bowl of warm water such that it is completely submerged. You have to allow it all to dissolve entirely so that the photograph can absorb the water.
5. Peel Off Photo
Take it out of the water and start gently rubbing on the photograph. This should result in the printed image tearing off completely. Peel off the photo slowly and be especially careful on the areas where the ink is transferred or being transferred to the contact paper.
6. Let the Paper Dry
Now put the contact paper on the table such that its sticky side is facing upwards. Leave it there so that the paper has some time to dry. When it becomes completely dry, its original stickiness will also be back.
7. Clean And Finish
It is now time to apply rubbing alcohol to the glass container and clean it through gentle patting. Then place the contact paper on it so that the sticky side is faced downwards and there is no air bubble forming underneath. You should be able to see the transferred photo on the glass at this point.
Final Word
Now you know how to transfer photos to glass using contact paper. It’s quite straightforward, isn’t it?
Along with the necessary items, you will just need some patience to follow these few steps and marvel at the beautiful customized piece you can then use to elevate your interior decorations.
Even though we used a glass container, you can follow these steps for other glass shapes like decorative plates, balls and more.