Whether you are a beginner or a professional, having the right 3D printer tools will save time and improve your prints’ quality.
With the popularity of 3D printing, there’s a variety of 3D printer tools available.
3D printers used to be expensive, bulky, and difficult to use, but now there are budget-friendly and compact options.
This makes 3D printing at home a fun and accessible hobby for just about anyone.
Choosing the right 3D printer tools can make printing more enjoyable, and less stressful and improve the overall print quality.
Read through our beginner-friendly guide below for help!
The Most Important 3D Printer Tools
If you are just starting with 3D printing, learning how to choose 3D printer tools as a beginner is essential.
You do not need to buy every tool and accessory upfront. Not only would this be expensive, but it would also be overwhelming.
Instead, you can focus your money and effort on purchasing the essentials, and then expand your tool collection as you become a more experienced 3D printer.
The following are what we consider to be essential 3D printer tools and equipment when deciding how to choose 3D printer tools as a beginner.
Read More: How Hard is 3D Printing? Here’s another guide that’s great for beginners.
1. A Filament Storage Container
A well-made filament storage container is one essential accessory any 3D printer user should invest in.
A dirty and damaged filament can lead to many printing issues.
For example, filament covered in dust, oil, and other types of debris can clog your 3D printer’s extruder nozzle.
In addition, a damaged plastic filament can lead to poor layer adhesion, breakages, and other printing disruptions.
By storing 3D printer filament in a secure and moisture-free container, you can be sure it will be ready to go whenever you need it.
Features of a Storage Container
The best filament storage containers have impressive and useful features.
These include an automatic filament dispenser, a humidity sensor, and a built-in thermometer that can display the container’s internal temperature.
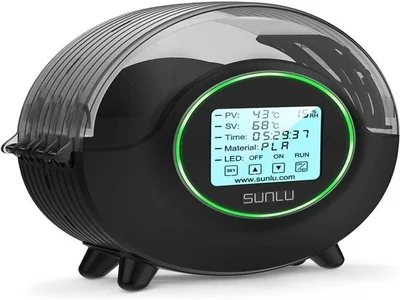
This SUNLU 3D Filament Storage Box has a touch screen that displays everything from the temperature, moisture rating, and amount of filament remaining.
When thinking about how to choose 3D printer tools as a beginner, this is an outstanding option for those who want a high-end storage container.
A Budget-Friendly Filament Dry Box
That being said, you do not have to rush out and buy one of these high-end storage containers when you are just starting out.
Investing in a few vacuum-sealed glass storage containers can also keep your filament dry and dust-free!
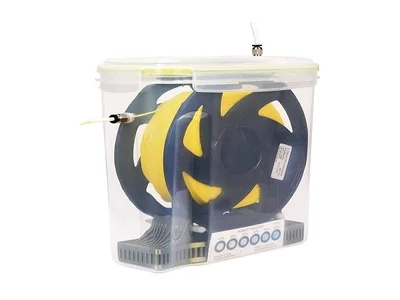
This BIQU 3D Filament Dry Box has a built-in dehydrator and a spool holder, so it’s also a perfect budget-friendly option for any beginner in the 3D printing community.
2. 3D Print Removal Tools
As you will quickly learn when first deciding how to choose 3D printer tools as a beginner, the first layer of a 3D print can often become stuck to your printer’s base build plate.
A specialized removal tool will make it much easier for you to remove your printed models.
While some people will attempt to use a kitchen spatula, this will not work nearly as well as a specialized tool.
Choosing the Right Removal Tool
The right 3D print removal tool will have the angle required to dislodge your print, but it will not have pointy edges that could scratch and damage your build plate.
These tools are also handy for removing extra filament residue.
Some 3D printers do come with a removal tool, but they are usually very low quality.
Given that you can generally purchase a set of 3D print removal tools for a low price, it is well worth investing in a set.
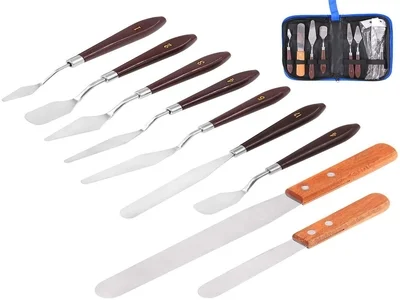
These Glarks 3D Print Removal Tools feature a sturdy handle, and each of the 9 tools has a different shape, so you always have the right tool for the job.
They even come in a convenient storage case!
3. An Illuminated Magnifying Glass
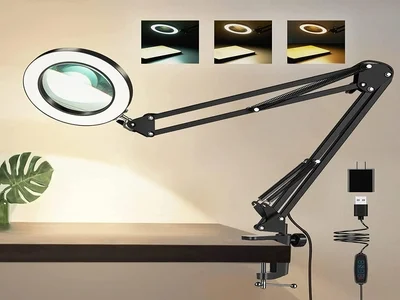
Once you have removed your model from your 3D printer, you will often have to perform post-processing work, which can involve filing away rough edges or excess pieces of melted filament.
An illuminated magnifying glass can help if you work with small models with intricate detail because it improves accuracy.
You will always have a well-lit workstation that will allow you to work with even the smallest 3D print miniatures.
This CUMKA 5X Magnifying LED Desk Light works incredibly well, as it’s easy to adjust and can clamp to just about any work surface.
Best of all, it’s available at a very budget-friendly price point.
4. A File Set
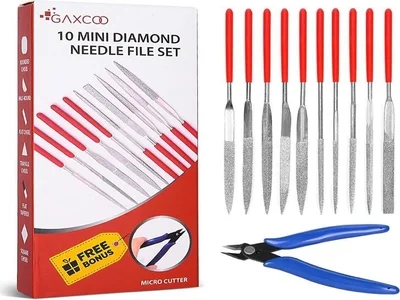
A good file set can be handy when you are doing post-processing work on your 3D prints, like removing rafts.
Depending on the complexity of your printing project, you may want to smooth out some of the rougher surfaces and give the model a smoother finish.
Ideally, you would use a diamond needle file set, as these tools are small enough that they can help you reach the smallest bits of excess filament in the hardest-to-reach areas.
Inexpensive Options
Considering that a good file set is not expensive, it can be worth the price to ensure that all of your 3D prints look their absolute best.
For example, this 10 Piece Multipurpose Needle File Set from Gaxcoo is perfect for working with 3D prints.
They are made from durable carbon steel and come in various shapes so that you can work on even the most delicate models.
The kit even comes with a bonus set of micro-cutting pliers!
5. PVA Glue Sticks
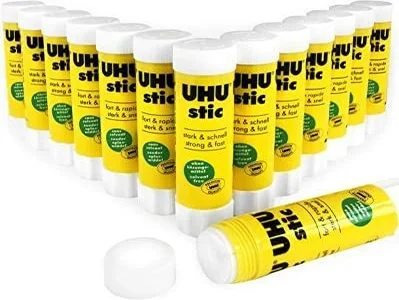
While it might sound a little strange, keeping a PVA glue stick in your 3D printing toolbox can be extremely helpful.
Yes, the same glue you used as a child for arts and crafts projects can serve a valuable purpose in 3D printing.
A thin layer of PVA glue spread across the print bed can help with first-layer adhesion.
Standard PVA glue is one of the best adhesion solutions that money can buy.
Not only does it work well, but it is also easy to wash away after you have finished printing.
Most PVA glue sticks are made with kids in mind, so some are washable with water and paper towels.
6. Needle Nose Pliers
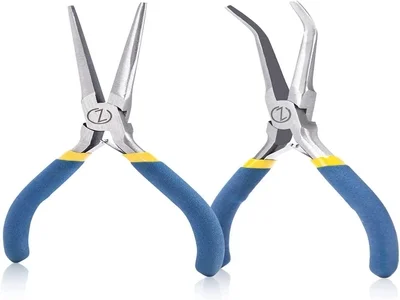
A good set of needle nose pliers is essential in any 3D printing toolbox.
This is because, if your printed model is stuck to the print bed or attached to a bit of excess filament, you can use the needle nose pliers to dislodge it gently.
They can also help you get a good grip on your printed model while you file away excess bits of filament and rough spots or while removing 3D print supports.
Multifunctional Necessity
In addition to helping you work on your printed models, you can use a good set of needle nose pliers to remove jams in your 3D printer.
Needle nose pliers are also really handy to have when it comes time to load new filaments into your printer.
If a bit of melted filament clogs your printer’s extruder nozzle, you can use pliers to remove the debris.
These 6” Miniature Needle Nose Pliers from VISEMAN have comfortable grips and extremely fine tips, making them perfect for 3D printing.
One set features a 45° angle while the other set is straight, so you can use the pliers for a wide range of applications.
7. Masking Tape or Kapton Tape
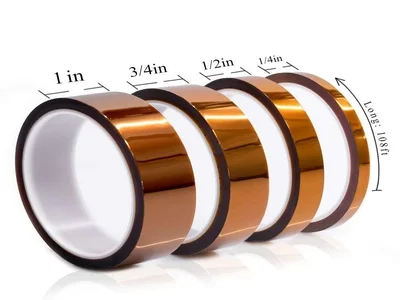
When deciding how to choose 3D printer tools as a beginner, you may be surprised to learn that another widely used item in 3D printing is basic household masking tape.
Not only can a layer of masking tape on the surface of your print bed help the first layer of your prints stick correctly, but it’s also easy to remove your printed models when they are finished.
A layer of masking tape will also make it easier to lift away an excess filament that would otherwise stick to the surface of your print bed and need to be removed by hand.
The masking tape can also protect the print bed from scratches and dings, which can be helpful if your printer features a glass print bed.
Any Masking Tape Will Do!
Fortunately, just about any masking tape brand will do the trick, so there is no need to go out and buy a more expensive roll.
With that said, you may want to go for one of the wider rolls, as it will not require as many strips to cover your entire print bed.
If you don’t mind spending a little extra, you can use Kapton tape because it can withstand high temperatures.
Benefits of Kapton Tape
Since many 3D printers feature a heated print bed, using Kapton tape will ensure the tape will not curl or warp during the printing process.
This set of MYJOR High-Temperature Kapton Tape comes with 4 rolls in your choice of widths.
The tape can also withstand temperatures up to 536° F, so it’s more than capable of handling the heat generated by a 3D printer.
The video below illustrates how easy it is to apply Kapton tape to a 3D printer bed:
8. 3D Printer Nozzle Cleaning Kit
The extruder nozzle, regardless of the 3D printer nozzle type, can become clogged over time.
The melted filament used to create your 3D models can dry within the model, especially if not cleaned between uses.
Given that the nozzle is one of the essential components in any 3D printer, you must keep it clean and in excellent condition to ensure peak performance.
While you may assume that you could clean out the nozzle with a pair of sturdy tweezers, removing all the debris from the nozzle can be pretty challenging.
This is where a 3D printer nozzle cleaning kit can come in handy.
Have a Nozzle Kit Available
These kits are relatively budget-friendly, saving you plenty of time and effort compared to cleaning a printer nozzle using tweezers or toothpicks.
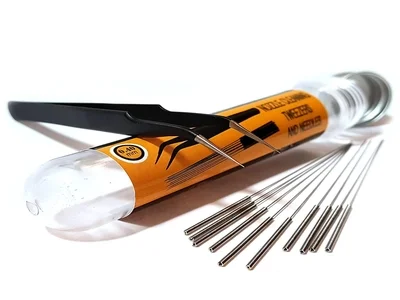
This 3D Printer Nozzle Cleaning Toolkit from REPTOR comes with everything you need to maintain a clean printer nozzle.
This toolkit comes with anti-static and curved tweezers and a 10-piece collection of stainless steel needles.
These needles will help you remove debris in the tightest nozzles.
You even get a case that will keep your cleaning kit together.
