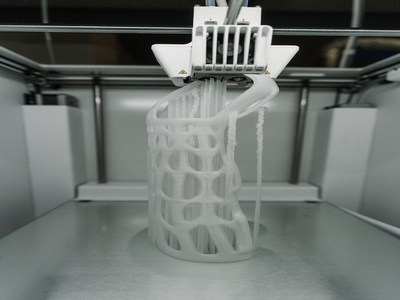
Removing 3D print supports can be difficult and tedious, but it can be easier with the right tools and techniques.
One of the most important things to keep in mind when removing supports is to be careful not to damage the model itself.
Removing them too aggressively can cause the model to warp or break.
In this blog post, we’ll discuss how to remove 3D print supports, common 3d printing problems that people face when trying to do so, and helpful tips to make the process easier!
How to Remove 3D Print Supports
Use A Pair Of Pliers Or Tweezers
One of the most common methods to remove 3D supports is to use a pair of pliers or tweezers. If done carefully, they are both pretty effective.
Start by grabbing hold of the support near the base and twist or pull it away from the model.
Be careful not to damage the model itself, but try to remove the supports in a single motion if possible.
Use A Sharp Knife
For supports that are difficult to reach with pliers or tweezers, or for more extensive supports, a sharp knife can be used instead.
Carefully start by inserting the knife’s blade between the support and the model, gently prying it away.
Be very careful not to damage the model!
Flush Cutter
You can also utilize a flush cutter or a cutter that cuts straight instead of at an angle.
The first step is to take your flush cutter and snip the supports off as close to the printed part. It is essential to be as close as possible so you don’t damage your print.
Deburring Tool
Once you’ve cut all the supports off, you will want to use a deburring tool to remove any sharp edges by smoothing them.
This is especially important if your print is for something that will be handled frequently, like a phone case.
Check out this video on how to remove supports for a visual guide:
For those Difficult Supports
Apply Heat
Applying a small amount of heat in 3D printing to the support base can sometimes make it easier to remove.
This can be done with a hairdryer, heat gun, or lighter, but be careful not to apply too much heat, as this can damage the model.
Use Lubricant
Applying a small amount of lubricant (such as petroleum jelly) to the support base can sometimes make it easier to remove as well.
This will help break down any adhesives that may hold the support in place.
Avery Glue Stick
If you’re looking for an easy way to remove support from your models, then an Avery Glue Stick is a great option!
The small tube is the perfect size to be applied directly to the support base.
The glue will dissolve the support, making them easier to be removed with tweezers or pliers. This method is quick, easy, and will not damage your model.
Read More: What to Use to Glue 3D Prints Together. Here’s how to combine printed parts into one piece!
Wire Brushes
Wire brushes are another great option for removing supports from your models.
These brushes come in various sizes and can be used to remove supports without damaging the model.
They are also handy for more extensive supports or supports that are difficult to reach with other tools.
Sandpaper
If you need to remove a 3D support that is close to the model itself, then sandpaper can be a great option.
Simply use a piece of sandpaper to sand away the support gently, but be careful not to press too hard and damage the model itself.
Acetone
If you are having difficulty removing a 3D support, acetone is another option because it will dissolve most supports, making them easier to remove.
Just apply acetone to the support base and wait for it to take effect.
But be careful where you are applying the acetone so you do not damage the model.
If you are still having difficulty removing support, you can try asking for help from a friend or family member. Double the hands, double the strength.
Double Check with an Electronic Digital Caliper
Once you have removed the supports, double-check with an electronic digital caliper to measure the height of your print.
While it may not seem important, by measuring your print, you can make sure all the supports have been removed, while also checking that your print is the correct size.
After Cutting: Sanding Off The Print’s Surface
Now that you have your print cut, it’s time to move on to the next step: sanding off the print’s surface.
This will help remove any remaining residue from the printing process and give your print a smooth, finished look.
To sand your print, you’ll need:
- A sheet of sandpaper (finer grit for smoother finishes)
- A piece of cardboard or other sturdy backing material
- Tape
- A work surface that can be easily cleaned afterward (such as a sheet of glass or plastic)
Start by taping your sandpaper to cardboard or other backing material.
Then, place your print on the work surface and begin sanding in a circular motion, applying even pressure across the entire surface to ensure a uniform finish.
Once you’ve sanded the entire surface of your print, remove the sandpaper and tape and discard them.
Then, wipe down your print with a damp cloth to remove any dust or debris. Allow your print to air dry completely before moving on to the next step.
Make sure to remove all 3D print supports before moving on to the next step, as any left behind will be very difficult to remove later on.
With your fully now-sanded print in hand, you’re ready to move to the final stage: painting!
Conclusion
In conclusion, removing supports from your prints can be tricky and time-consuming.
However, with the right tools and techniques, you can easily remove those 3D supports and be on your way to enjoying your beautiful prints!
Thanks for reading and happy printing!