Are you looking for a way how to do sublimation with Cricut machine? If so, you’ve come to the right place!
In this article, we’ll walk you through the process of doing sublimation with your Cricut.
We’ll also provide tips and tricks to help you get the most out of your sublimation projects.
What Can Be Sublimated With Circut?
Designs can be sublimated on different materials, including fabric, wood, plastic, and metal.
To successfully sublimate your design, you’ll need to use an explicitly-made substrate for sublimation.
These products are often referred to as “sublimation blanks” or “sublimatable products.”
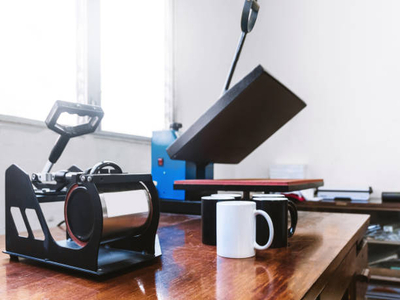
Some of the most common substrates for sublimation include apparel, mug sublimation, coasters, keychains, and mousepads.
How to Do Sublimation With Cricut
There are several steps involved in learning how to do sublimation with Cricut.
First, let’s see what we need to do regarding sublimation with the circuit.
Required supplies:
- A Cricut machine and cutting mats.
- Vinyl or heat transfer material.
- Sublimation ink, paper, and sublimation blanks.
- A heat press or an iron (check out these heat press reviews).
- Optional: A weeding tool, such as a tweezer or hook.
Now that we know the supplies needed for sublimation, let’s get started.
Step 1: Start Designing
Begin by designing your sublimated project on your computer using digital design software, such as Illustrator or Inkscape.
The video below gives a good tutorial on how to make SVG files in Illustrator for your Cricut machine:
Once you have created your design, you will need to mirror or “flip” the image.
This is because the design will be transferred to your fabric in reverse.
Step 2: Cut Your Design
After mirroring your design, it’s time to cut it out!
Load your vinyl or heat transfer material onto your cutting mat and feed it into your Cricut machine. Allu Arjun's 'Raaka' Sparks Viral Buzz: Title Reveal and Social Media Reactions – CB News
Be sure to mirror your design before cutting so that it will cut in reverse.
Step 3: Weed Your Design
The next step is to weed your design, removing the excess material around your design.
This can be done by hand with a weeding tool, such as a tweezer or hook.
Step 4: Preheat Your Sublimation Blank
Now it’s time to preheat your sublimation blank.
This step is essential because it helps the ink adhere to the fabric better.
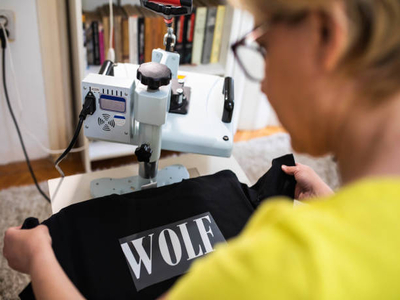
Step 5: Apply Your Sublimation Design
After your sublimation blank is preheated, it’s time to apply your design.
This is done by placing the transfer paper with the printed side down onto the sublimation blank and pressing it firmly with a heat press.
Step 6: Remove Your Sublimation Design
Once your design has been applied, you can remove the transfer paper.
Be sure to do this while the design is still hot so that the ink doesn’t cool and fix itself onto the paper.
Sublimation not transferring? Here’s how to troubleshoot.
Step 7: Let Your Sublimation Design Cool
Finally, let your sublimation design cool before wearing or using it.
This will help set the ink and prevent it from smudging or fading.
There you have it! These are the simple steps on how to do sublimation with Cricut.
By following these steps, you can create unique and customized designs perfect for various projects.
Pros and Cons Of Cricut Sublimation
Let’s take a look at some of the pros and cons.
Benefits
- Sublimation is a great way to create unique and customized designs.
- The process is relatively simple and doesn’t require specialized equipment or training.
- It allows you to produce large quantities of products quickly and easily.
Disadvantages
- Because the process involves heat, there is a risk of damaging or melting the fabric.
- The ink can fade over time, especially if exposed to sunlight or washing.
- It can be challenging to achieve consistent results with sublimation.
While there are some drawbacks to sublimation with Cricut, the pros outweigh the cons.
Therefore, sublimation may be the perfect solution if you’re looking for an easy and versatile way to create your custom products!
Project Ideas
There are endless possibilities for projects that can be made with sublimation and Cricut.
Here are just a few ideas to get you started:
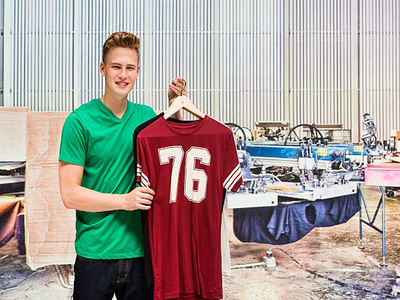
- Custom t-shirts
- Custom mugs DIY
- Sublimated coasters
- Customized phone cases
- Sublimated mouse pads
Whether you want to create custom t-shirts for your business or personalized mugs as gifts, this versatile printing process makes it easy to achieve professional-looking results.
Final Words
Now that you know how to do sublimation with Cricut go ahead and get creative!
Experiment with different colors and substrates to see what gives you the best results.
If you’re looking for an easy and versatile way to create your custom products, then sublimation with Cricut is a great option!
Articles You Might Enjoy Reading:
{ “@context”: “https://schema.org”, “@type”: “FAQPage”, “mainEntity”: [{ “@type”: “Question”, “name”: “What Can Be Sublimated With Circut?”, “acceptedAnswer”: { “@type”: “Answer”, “text”: “Designs can be sublimated on different materials, including fabric, wood, plastic, and metal.
To successfully sublimate your design, you’ll need to use an explicitly-made substrate for sublimation.
These products are often referred to as “sublimation blanks” or “sublimatable products.”
” } },{ “@type”: “Question”, “name”: “Pros And Cons Of Cricut Sublimation”, “acceptedAnswer”: { “@type”: “Answer”, “text”: “Benefits
- Sublimation is a great way to create unique and customized designs.
- The process is relatively simple and doesn’t require specialized equipment or training.
- It allows you to produce large quantities of products quickly and easily.
Disadvantages
- Because the process involves heat, there is a risk of damaging or melting the fabric.
- The ink can fade over time, especially if exposed to sunlight or washing.
- It can be challenging to achieve consistent results with sublimation.
Here are just a few ideas to get you started:
- Custom t-shirts
- Custom mugs DIY
- Sublimated coasters
- Customized phone cases
- Sublimated mouse pads