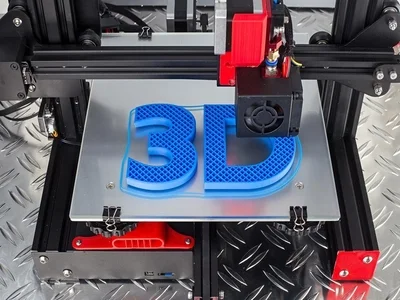
The first layer 3D print is critical, as it will become the foundation on which you will lay the rest of the print.
To make sure yours always comes out perfect, we have a complete guide to first-layer 3D printing!
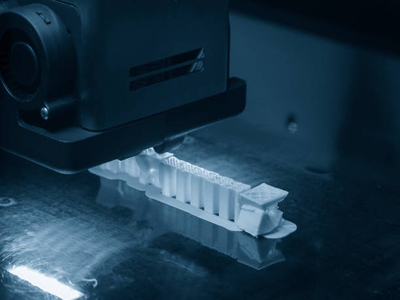
Doing the First Layer of Your 3D Prints Right
Whether you are working on a complicated print or a relatively simple model, keeping the following tips in mind will make sure that the first layer 3D print is always done right.
1. Properly Level the Bed
As you would expect, an uneven print bed will almost always disrupt the quality of the first layer of any 3D print.
In fact, an uneven print bed will often result in prints that do not correctly adhere together.
Print Nozzle Issues
If your 3D printer’s print bed is not perfectly flat and evenly leveled, the print nozzle will not maintain an even distance to the bed.
When this occurs, the printing nozzle will struggle to properly lay out the first layer 3D print.
Read More: 3D Printer Best Nozzle Size. If you’re new to nozzle types and sizes, check out this post!
Adhesion Problems
You can also run into adhesion problems if the print bed is perfectly level but is set too far away or too close to the print nozzle.
Again, this would result in an unstable first layer, negatively impacting the overall quality of your 3D print.
Read More: 3D Printer Not Sticking to Bed. See how to troubleshoot print bed issues!
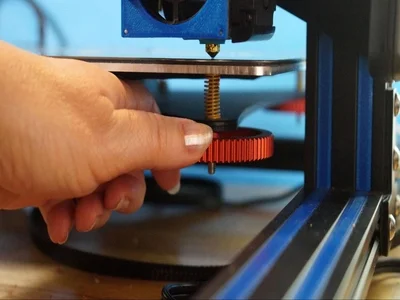
How to Level the Print Bed
Each 3D printer will have a unique and specific way the print bed levels, so you must consult your instruction manual.
Fortunately, it tends to be a relatively simple task that does not take long to do correctly.
Most 3D printers can be leveled by adjusting screws, while more expensive and high-end machines will level themselves automatically with the push of a button.
These models use bed leveling sensors, making the bed leveling process straightforward and accurate.
The video below will show you how to level your 3D printer bed for the perfect first layer.
No matter how complicated the task is for your specific 3D printer, you must not skip this step to ensure that the first layer of your prints will come out right.
You should check to ensure the print bed is level each time you use your 3D printer.
2. Slow Down the Print Speed for the First Layer
The key to a good first layer is ensuring it sticks properly to the print bed.
There are numerous ways to improve the chances of this, and many of them involve quick settings adjustments.
Slowing the print speed for the first layer will give it more opportunity to harden and bond to the print bed.
This means there will be more time between that material being extruded and the next layer.
While the speed reduction you choose will depend on the specific design you are printing, it’s a good idea to have the first layer print at a speed that is 25% to 50% slower than the other layers.
How to Reduce the Print Speed
Most 3D printers will have dedicated settings for the print speed of the first layers, but you can often make adjustments within the printing software you are using.
For most programs, you will click the tab labeled “Layers.”
Then, you can usually access a drop-down menu that will open up various first-layer options.
Whether you have a complex printer that allows you to adjust print speed settings on the machine itself or one that requires you to use software, lower the speed for the first layer by 25% to 50%.
You should note the results and adjust the speed until your first layers consistently stick to the base.
3. Adjust the Temperature Settings
In addition to ensuring that the print bed is level and the print speed is set appropriately, it is also essential to ensure that your 3D printer has the correct temperature settings in place.
As the print nozzle extrudes filament, it heats it to a specific temperature.
Higher temperatures allow the filament to melt better, which increases the likelihood that it will adhere to the print bed properly.
As you would expect, this is critical when printing the first layer of any 3D model.
Set the heat platform
Most 3D printers also have heated platforms that you can adjust to specific temperatures, helping to improve adhesion.
It’s also essential to have it set to the right temperature if you want your first layer to turn out well.
As you work with your 3D printer, try to adjust the extruder nozzle temperature and the heated build platform until you have found the perfect temperature.
During this adjustment phase, you will want to increase the temperature by 5-degree increments each time until you have found the ideal temperature for printing solid first layers.
Consult Manufacturer Packaging
You should also consult the packaging of the type of filament you use.
Usually, the manufacturer lists the ideal extruder temperature and bed temperature for the best results with that specific type of filament.
How to Adjust the Temperature
Most 3D printers will allow you to adjust the nozzle and heated bed temperature separately.
This is usually controlled through a dial, but more advanced models have a digital control panel that allows you to fine-tune the temperature within a single degree.
Ideally, the nozzle temperature will sit between 410°F and 482°F, while you should set the heated bed between 176°F and 230°F.
If you are finding that your first layers are not adhering correctly, you can adjust the settings higher on these temperature ranges.
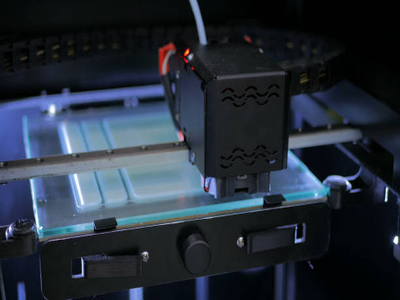
4. Maintain a Clean Print Surface
Since your first layer will sit directly on the print surface, it is worth taking the time to make sure that the printing surface is free from debris.
By regularly cleaning your 3D printer’s print surface, you can significantly increase the quality of your prints, particularly the first layers of those prints.
This is because dust, grease, leftover filament, and other types of debris can increase the likelihood that your first layer will not adhere to the printing surface properly.
If the first layer cannot adhere correctly, the result could be a wholly failed print.
How to Maintain a Clean Print Surface
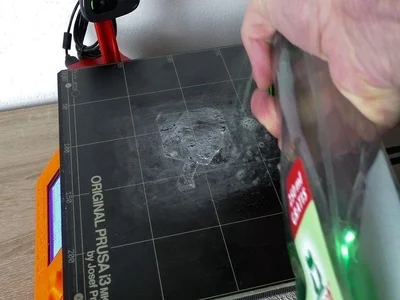
Start by wiping down the print surface with a clean microfiber cloth before each new print, as this can help remove dust and other loose particles.
Once you have given it a quick wipe down, you can spray isopropyl alcohol on a clean piece of paper towel.
Using the damp paper towel, gently clean the 3D printer bed, as this will help remove any grease or hardened filament from a previous print.
You will want to avoid rubbing alcohol, which can do more harm than good.
Read our related article on How to Clean 3D Printer Nozzle to prevent jams.
5. Treat the Freshly Cleaned Print Surface
If you are having difficulties making your first layer stick properly, you can try treating the build surface with various materials.
Some 3D printers find that a thin layer of glue from a basic glue stick helps.
Some will also use a layer of hairspray on the surface of the print bed.
Both are budget-friendly options that can help the first layer of your prints adhere to the print surface, ensuring a higher-quality print.
Check out our guide on the Best Glue Stick for 3D Printing for the most reliable options.
Specialized Materials Available
If you are willing to spend a little extra, there are specialized build surface materials specifically for 3D printers.
A BuildTak sheet is a popular choice.
These stick-on sheets are heat-resistant materials that are not damaged by hot filament but can improve adhesion, which should improve the quality of your prints.
You can also purchase polyetherimide (PEI) sheets, specialized layers of plastic designed to be glued to the outer surface of the build plate.
PEI sheets help improve poor adhesion and usually work with just about every type of filament.
6. Consider Purchasing Appropriate 3D Printer Accessories

If you still have issues ensuring that your initial layer adheres to the print surface, you may want to try one of the many different accessories that can help with first-layer adhesion.
Heated Filament Storage Container
You can consider a heated filament storage container.
Since the quality of your filament will play a significant role in the outcome of your prints, it’s worth taking care of that filament.
These airtight boxes keep the filament dry and dust-free. They also have built-in temperature and humidity sensors.
Heat Bed Platform Stickers
Heat bed platform stickers are also handy and affordable.
You simply position them on your printer’s heat bed, then you print directly on them.
They create a clean and gripped surface for the initial layer to be printed on, making it more likely to adhere properly.
Nozzle Cleaning Kits
Nozzle cleaning kits are also helpful in ensuring your first layers are printed correctly, as well as the rest of your 3D print projects.
To avoid a clogged nozzle, you must clean it out regularly with the correct tools.
Cleaning the nozzles will improve the quality of your entire print, including the first layers.
7. Try Different Printing Materials
Changing the type of filament you are using can improve the results you get with your first layers.
As you would expect, lower-quality filaments tend to produce lower-quality results when printed.
If you have tried all of the tips outlined above, but your first layers are still not adhering to the print surface, it might be time to try a different type of filament.
It’s also possible that the 3D printer you are using is malfunctioning and could need service.
However, looking into this should only be necessary if you notice significant issues with your prints’ quality.
Stop by our related article where we cover How to Choose 3D Printer Tools as a Beginner!
8. Implement Skirts, Brims, and Rafts into Your Designs
You can also fine-tune your designs by using a few simple printing techniques to help support your model’s first layer.
You have 3 options for printing first-layer supports:
- Skirts
- Bims
- Rafts
To help you understand how each can help improve the level of adhesion between the print base and your first layer, we will go over each helpful printing feature.
You can add each of these 3 features to your design software, so they are pretty easy to use.
Printing Skirts
Skirts are design features printed around the printed model.
By surrounding the model you are printing, the skirt will help support the first layer and keep the entire printed object standing upright.
Skirts also serve a secondary function of preparing the nozzle before it begins printing the main object.
It ensures that the nozzle is flowing correctly and that the filament heats to the perfect temperature.
In other words, priming the extruder ensures that your first layer will turn out right.
By printing the skirt, your first layer will have a solid foundation, and you will know that you will dislodge any minor blockages within the nozzle before printing the first layer of your object.
Printing Brims
Brims are similar to skirts, but they make far less contact with the walls of your 3D prints.
Where a skirt only makes minor contact, or, in some cases, no contact at all, a brim is usually printed beneath the first layer of the print.
In this sense, a brim can almost act as a solid foundation beneath your first layer.
Because they go beneath the model and around it, they tend to use more filament than a skirt, but they can improve the overall quality of your first layer.
Printing Rafts
Rafts provide a solid base upon which your model’s first layer will print.
They can also help correct bed-level issues and provide room for error.
This first layer of your model will be printed directly on the raft, providing better support, as the filament is more likely to adhere to other, freshly-printed filament.
Once the design is complete, you will remove the raft using a blade or file by hand.
It’s worth noting that rafts require more filament than skirts and brims, so they can be somewhat wasteful if they are not necessary.
They also have to be removed afterward, which, depending on the scale of your model, can take a significant amount of effort.