Have you ever looked at an intricate design with absolute admiration while wondering how on earth can you ever reconstruct this?
Well, where there is a will, there is a way!
Just take the help of one or two tracing papers to bring that design on your new art project or apparel.
Let us tell you how to use tracing paper in three ways to transfer the pattern from the original illustration to your preferred surface!
Three Ways To Use Tracing Paper
1. Pencil

Things You Will Need:
- Graphite Pencil
- Tracing Paper
- Target Paper
Steps
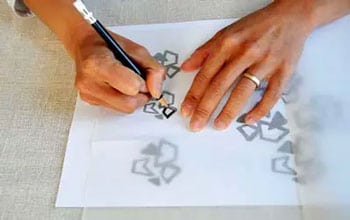
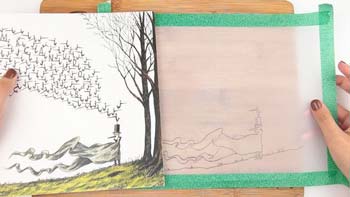
A. Place Tracing Paper On Image
Firstly, you need to properly place the tracing paper on the image you are trying to transfer or recreate. It is important to position the paper accurately so that elements of that design or picture stay consistent throughout the copied version. That is why you need to keep the table or tracing surface as stable as possible.
Since this process is the most elementary one where you will need to manually maintain the consistency and stability, we would recommend going for the simplest image available.
B. Trace With Pencil
Use a sharp graphite pencil capable of delivering dark shades to trace the original design or drawing on your paper. Choose a pencil whose marks don’t smudge if rubbed slightly and that can replicate fine lines on waxy surfaces without trouble. Now use it to follow the lines on the image under your tracing paper.
C. Trace Back On Target Paper
After completing the tracing of original picture with your pencil, get ready to recreate the image on your preferred target paper.
In this step too, you need to carefully maintain the stability of your drawing fingers and both the papers to accurately reproduce the image.
Flip the tracing paper so that the pencil drawing is facing the new paper surface. For this part, you will only need to rub the blunt or flat end of your pencil along the traced lines to replicate the original photo.
D. Add Your Modifications
You will get to see the duplicate image on your preferred surface after removing the tracing paper.
Now you can add any modification to this new rendition in order to bring a unique twist to the mix. Alternatively, you can just color them with a different palette than the original one.
2. Tape
Things You Will Need
- Masking tape or some other kind of tape
- Tracing paper
- Lead pencil
Steps:
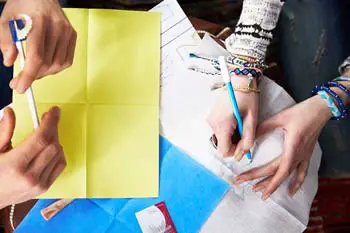
A. Tape Tracing Paper On Illustration
Similar to the previous way, you will need to properly position the tracing paper on your chosen illustration. However, this time it will be easier for you to keep the arrangement steady for a long time due to the inclusion of tape.
Just use this tape on all four sides of the tracing paper to fix it on the original image. You can fold edges of the transparent paper with that of the image to hold the tape stronger in its place.
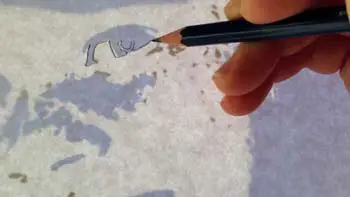
B. Trace The Picture With A Pencil
Now use your lead pencil to trace along the outlines of that illustration. Even though the tape is there, it is safer to also use your other hand to keep the setup in place. It is important to use a pencil for this step so that you can transfer the design on another surface later easily.
C. Flip And Tape On Target Paper
When you are done tracing the entire image or illustration, take off the tapes from the paper edges. Do this slowly and carefully so that any part of the paper doesn’t get torn in the process.
Now flip this traced paper on your target surface so that the pencil marks are directly touching it.
Tape the paper on this new surface again by accurately superimposing its marks on the target.
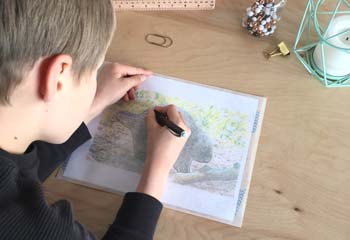
D. Draw Again Following The Trace
All you have to do now is follow the traced lines and rub them over the underlying surface. It is better to use watercolor paper, sketchbook paper, canvas or a similar surface for making this transfer. The pencil marks will show up most clearly on these textures.
3. Fabric
Things You Will Need
- Piece of fabric
- Lightweight tracing paper
- Pen or sharp marker
- Embroidery frame
- Thread and needle
Steps
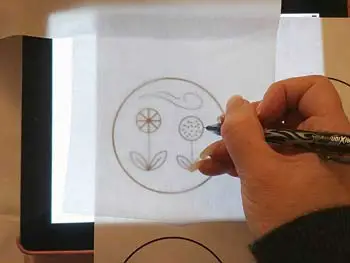
A. For those of you who have an interest in creating art in the form of clothes, it must be important to recreate your envisioned design flawlessly on fabric.
Tracing paper can help you in this endeavor by accurately transferring the motifs from the original page to the cloth. To begin, trace your chosen pattern on the tracing paper by keeping the paper on it. Use a ball pen or a sharp marker whose ink does not get smudged on paper for this step.
B. Prepare your fabric for sewing in the next step by properly placing it in the embroidery frame. Doing so will keep that area uniform and steady throughout your sewing work.
C. After fully copying the design on tracing paper, place it on the framed fabric and use basting techniques to hold it there. In needlework, baste means to use long and loose stitches to keep something in place.
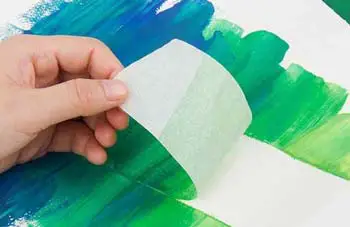
D. Then start sewing like you usually do following the traced design set there. When you are done replicating the entire pattern on your fabric area, just slowly tear away the tracing paper.
Tips On Using Tracing Paper
Apply Right Amount Of Pressure:
Make sure you are applying the right amount of pressure on the tracing paper while transferring the design. If it comes off too strong, then the lines can smudge.
On the other hand, the lines may not even form if you press too lightly. So lift up one corner of the paper slightly to check how the transfer is going on underneath.
Remove The Tape Carefully:
After completing the entire process of tracing and transferring the design, remember to be cautious about removing the tape used to keep the paper stable. Especially if you are drawing, sketching or working with the canvas, be sure to carefully release the tape by lifting each corner.
But Don’t Remove All Of It:
Don’t remove the tape completely since it can still help you to fix any issue remaining on the transferred design. So pull off all the sides except one side which will function as a hinge.
If you observe any inconsistency or a missed spot on the pattern, use that hinge to position the paper again to mend it.
Wash Your Hands:
Once you are done working with the tracing paper that involves pencils, wash your hands immediately to get rid of the remnant graphite content there.
This will prevent those marks from smudging your brand new canvas and thus help you to continue the work in a cleaner way.
Conclusion
Now that you know how to use tracing paper in different ways to make the most of each sheet, you can finally start working on that interesting pattern you have been marveling at for so long!
Just decide on what surfaces and media the project will involve to begin this wonderful journey of creativity.
Also read: