Screen printing is a popular way to transfer designs onto fabric and other materials.
It can be used for personal projects or for creating products to sell, making it very popular to learn how to make screen print transfers.
If you want to learn how to make screen print transfers, this guide is for you! There are a few different techniques that can be used to create screen print transfers.
This article will explain the process step-by-step and give tips on how to make screen print transfers and achieve the best results.
Why Make Screen Print Transfers?
Screen printing is a widespread technique that involves the passing of ink through a fine mesh screen to create a design on fabric or paper.
Traditionally, screen printing has been done by hand, but it can also be done using a machine.
Screen printing transfers are a type of screen print in which the design is transferred onto another surface, such as wood, glass, or metal.
Temporary or Permanent Designs
Transfers are often used for temporary applications, such as decorating walls or windows for special events.
They are also helpful in creating permanent designs on surfaces that cannot be directly printed on, such as curved surfaces or textured walls.
Screen print transfers are easy to make and can be customized to any size or shape.
They can also be applied quickly and easily, making them an excellent option for businesses or individuals who want to add a professional-looking touch to their projects.
See our related article on the Best Printer for Screen Printing! We review the top printers on the market today.
How to Make Screen Print Transfers
Making screen print transfers is a great way to add custom images to t-shirts, tote bags, and more.
The process is relatively simple and only requires a few supplies and steps:
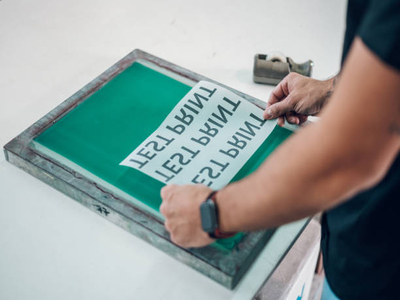
- First, you’ll need to create a stencil of your desired image.
- Then, you’ll need to lay the stencil on top of your fabric and secure it in place.
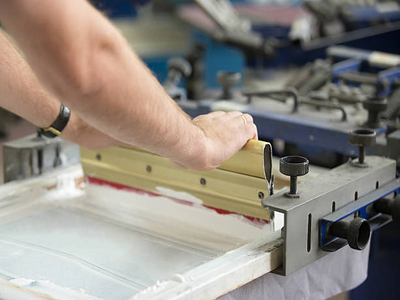
- Next, you’ll need to apply ink to the stencil using a squeegee.
- Once the ink is dry, you can peel off the stencil and reveal your finished design.
Screen print transfers are a great way to personalize any project, and with a bit of practice, anyone can create professional-looking results.
Want to take your screen print transferring to the next level with digital screen printing transfers? Watch the video below to find out how!
Advantages of Screen Print Transfers
Now that you know how to make screen print transfers, what are the advantages?
Screen print transfers offer many advantages compared to other methods of applying images to clothing and other fabrics.
Versatility
Perhaps the most obvious benefit is their versatility.
Unlike dye sublimation or heat-press transfers, screen print transfers can be used on a wide range of different materials, including cotton, polyester, canvas, and more.
This means they are straightforward to customize and can be applied to everything from t-shirts and sweatshirts to hats and bags.
Read More: Do You Need a Heat Press for Screen Printing? See what materials you need to get started!
Durability
Another advantage of screen print transfers is their durability.
Unlike regular inks, which can fade or wash over time, screen printing ink holds up exceptionally well against fading and wear, allowing your transferred images to look vibrant for many years.
Little Setup
Finally, screen print transfers also require relatively little setup.
All you need is an image file on your computer and some transfer papers, inks, and screens, which are readily available online or at local craft stores.
Whether you’re looking for a simple way to bring your artwork to life or want customized t-shirts for a special event or promotion, screen print transfers offer an affordable and effective solution.
Tips to Make Screen Print Transfers
To create a screen print transfer, you will need the following materials:
- A printed image or design.
- A t-shirt or another piece of fabric.
- Some overexposed transparency, such as contact paper or printable acetate.
Once you have these things ready, follow these tips to ensure that your transfer turns out perfectly:
Cut your printed image down to size
Make sure you cut your printed image down to size before applying it to the undersurface of your transparency.
Make sure any large areas of white space are cut away, as they may cause issues with ink running through your image during the printing process.
Try Using Freezer Paper
When printing your design onto the back of your transparency material, try using freezer paper instead of standard paper.
This will prevent the ink from transferring through when you burnish it down.
Using a laser printer for this step can improve results.
Use Acidic Water
To create the best screen print transfer possible, use an acidic water wash on both sides of your finished image before applying it to your shirt or fabric surface.
This will help set the ink and prevent bleeding or smudging during wear and washing.
With these simple tips in mind, you’ll be able to create perfect screen-print transfers every time!
Read More: Is Screen Printing Cheaper Than Vinyl? We cover how screen printing compares to vinyl here!
Final Words
Now that you know how to make screen print transfers, it’s time to get creative!
The sky is the limit for designing your t-shirts, hoodies, and other apparel.
Experiment with different methods and materials to find what works best for you.