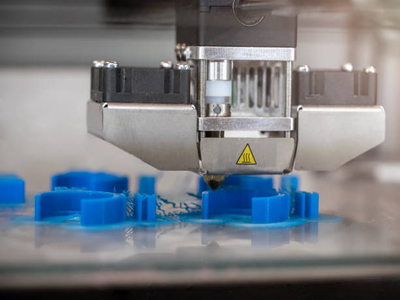
Brims are flat surfaces that attach to the external measurements of your model and are made of multiple thin layers.
Though brims are essential during the printing process, they become unnecessary afterward and must be removed in post-production.
Removing brims from your 3D print might be challenging without causing damage and require specialized equipment or methods.
In today’s article, we’ll discuss 6 tips on how to remove brims from 3D prints without hurting your print!
how to remove brim from 3D print: 6 Methods
1. Adjust the Slicer Setting for the Brim

Brims in 3D printing stay firmly attached to the print after the print is complete.
Even though they’re supposed to peel off after they’re done, removing them may be difficult, particularly if you want to obtain the desired form of your item at the end.
Using appropriate 3D printing software adjustments on your 3D printer before printing is one of the greatest methods to prevent deformities.
The majority of model-cutting programs are designed for producing brims and rafts.
However, you may change them to have the desired spacing distances if you wish to increase the distance between the model and the brims (and/or rafts).
By placing the brim with adequate space between the model and the brim for good bed adhesion, removing the brim becomes easier.
For example, the “Raft Air Gap” option creates a broad gap between the raft and your printer model.
Although it’s intended for rafts, you can use the same logic when using brims in 3D printing.
You can also set a wider width to create a larger ring to surround your item and ultimately make it simpler to remove the brim.
Read More: Gaps in 3D Printing. We cover filling gaps in your 3D prints!
2. With your hand, bend the brim a few times
The brim generally adheres to the edges of your model when you are finished printing.
If the brim does not adhere too firmly to the outline, removing the brim with your hands without damaging the print can be easy.
There are a couple of different ways you can remove the brim with your hands.
- The first option is to bend the brim in the direction of the model, then bend it backward, repeating this step a few times until the brim loosens up and falls off.
- Alternatively, you can twist it back and forth as many times as desired and eventually the brim will peel off.
Regardless of which method you choose, make sure you use some no-cut gloves while removing the brim.
These gloves will protect your hands from the sharp plastic that may slip and cut you as you bend it.
3. Use a Deburring tool

Using a deburring tool can quickly separate the brim from the print. It’s cheap, accessible, and simple to use.
Let’s have a look at how to use it:
- Hold the instrument against the edge you want to cut so it is flush with the surface.
- To prevent your printer from sliding around on a smooth surface, add friction to the outside portion of your 3D print.
- Repeat the procedure on the other four corners of your print until the brim falls away.
- If possible, cut the brim from the model instead of making your own cut.
Some safety equipment may be required depending on the type of blade you’re using and how precise you need to be with it.
Always keep safety in mind while working with 3D prints.
4. Use a Nipper to Cut the Brim
To remove a brim from an object, you can also use different types of nippers.
Flat nippers and plastic cutting scissors are two common options.
Both instruments work well, and you can use either depending on your preference or availability. That said, it may be better to use both simultaneously.
Below are the guidelines to extract the brim using a nipper:
- Use a pair of nippers, such as scissors, to remove the outer portions of your design.
- After the brim has loosened, use your hand to pry it off.
- Remove any remaining braid residue with the second flat nipper after removing the cloth.
Remember to be cautious while using these instruments as they are typically sharp and can easily cut you if you misuse them.
Make sure that you remove the brim away from yourself towards the direction in which you are cutting so you don’t accidentally cut yourself.
5. Use a Knife

If you want to make your design appear smoother at its edges, a sharp blade will be necessary.
Using a sharp knife will save time by making quick cuts and is safer to use than a dull knife.
An X-Acto X3311 Knife has a lightweight handle and is perfect for delicate, precise cutting, trimming, and stripping.
To detach the brim from your model using a knife, carefully slice evenly through its edges.
Once slices have been made, you can snap the brim.
6. Use Soluble Materials
Soluble materials are materials that dissolve in liquid.
Out of all of the filaments out there for 3D printing, only PVA filament is water soluble, which can make removing brims less tedious.
This can be done by removing your print from the bed and submerging the brim in warm water.
Let it soak for a couple of hours and agitate the water every hour or so and the brim will peel off after a while.
If you want to speed things up, simply heat the water, making sure it’s not hotter than 95°F.
A hotter temperature will accelerate the dissolving process.
The video below shows how to cleanly remove brims from your 3D prints:
Read our related article on the Best PVA Filament. We put the best PVA filament to the test and here are our favorites (and why!)
Conclusion
Removing brims from your 3D prints can be difficult, but using one of the six strategies we mentioned can help ensure there is no damage or deformity to your print.