What is slicing in 3D Printing?
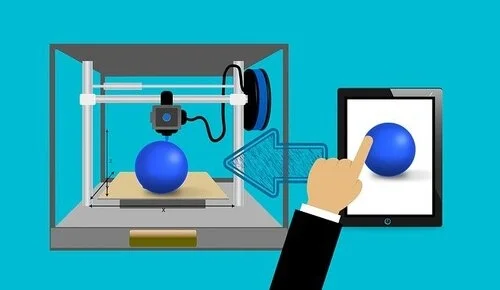
Slicing is the process of taking a 3D model and turning it into instructions that a 3D printer can understand.
These instructions tell the printer what to print, how to print it, and what materials to use.
Without slicing software, you wouldn’t be able to create anything with your 3D printer!
What Is Slicing In 3D Printing?
When it comes to printing, there are a variety of terms and processes that can be confusing for those who are new to the industry. One such term is slicing.
Slicing is the process of breaking down a 3D model into thousands of horizontal layers, which can then be printed one layer at a time.
This is necessary because most 3D printers are only able to print one layer at a time.
In general, the slicing process is performed by software that takes into account the specific capabilities of the printer being used.
There are a variety of factors that must be considered when slicing a 3D model, such as layer height, infill, supports, and more.
As a result, it’s generally advisable to leave the slicing to the experts.
However, it’s helpful to have a basic understanding of the process so that you can make informed decisions about your prints.
The Benefits Of Slicing In Printing
Slicing Creates Detailed Instructions For The Printer
The slicing process uses specialized software to generate instructions for the printer, telling it exactly how to print each layer of the object.
The instructions are based on Computer-Aided Design (CAD) models that have been exported as Standard Tessellation Language (STL) files and broken down into horizontal planes.
Each plane then receives its own set of instructions detailing exactly where to position the printer nozzle and what material to lay down next.
By dividing up the object into multiple layers, slicing makes it possible for users to print very intricate 3D objects, allowing the printer to build them up gradually from the bottom up.
Thus, slicing is an essential component of successful 3D printing that ensures accuracy and precision in every object.
Slicing Software is Essential
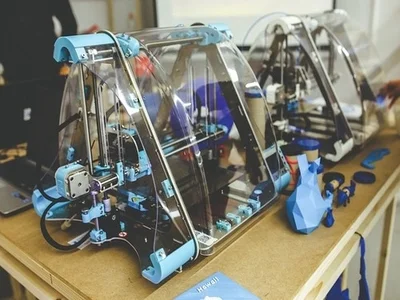
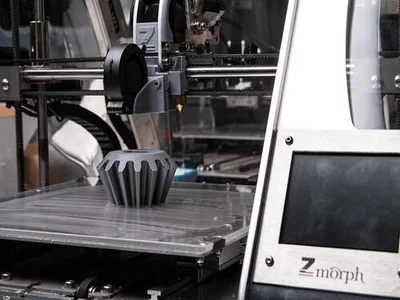
Slicing software is an essential tool for anyone who owns a 3D printer because the software breaks down a 3D model into layers that can be printed one at a time.
This process is essential for ensuring that the final product is of the highest quality.
The slicing software also takes into account the capabilities of the printer, such as the size of the build platform and the nozzle diameter.
This ensures that the print job is completed without errors.
In addition, slicing software can be used to generate support structures for complex prints that help prevent warping, ensuring the print job is completed successfully.
Without slicing software, it would be nearly impossible to produce high-quality 3D prints.
Therefore, it’s clear that slicing software plays a vital role in the 3D printing process.
Slicing Allows For A High Degree Of Customization Needs
Slicing has become an essential part of modern printing because it allows printers to produce highly customized products with a high degree of accuracy and reliability.
This process gives users the ability to program their designs in a way that controls various features, such as infill density, support structure placement, and print speed.
By adjusting these factors, printers are able to fine-tune their prints to meet the specific needs of each project.
For example, if you’re working on a prototype or test model, you may want your object to have a high infill density so that it can withstand additional stress.
Alternatively, if you’re crafting decorative objects or small components, you may want to reduce the amount of infill in order to save time and material costs.
In short, slicing is an integral part of modern 3D printing and offers a powerful tool for achieving exceptional results.
Slicing Is An Automated Process
As an automated process, slicing can be set up once and then left to run without any additional input from the printer operator.
This makes it easy to run large batches of prints without needing constant supervision or manual adjustments.
Additionally, many slicers have a number of special features that allow you to control things like infill density, support generation, and more.
So, if you’re looking for high-quality prints with minimal hassle, slicing is definitely the way to go.
Simply set up your parameters, press start, and let the slicer take care of the rest!
Read More: How Small Can You 3D Print? Explore print limitations and view a video of Micro Prints in this awesome guide!
How To Slice Properly For Optimal Printing Results
When slicing, you must take into account the resolution of your printer, the infill percentage, and support structures.
An improper slice can result in poor printing quality or even cause your print to fail entirely.
Luckily, there are a few simple tips you can follow to ensure that your slicing is up to par.
1. make sure that your model is in STL format
STL is the standard file format for three-dimensional models and is what most slicing software will require.
If your model is in another format, such as OBJ or PLY, you can use a free conversion tool like MeshLab to convert it.
2. open your STL file in your slicing software of choice
There are many different slicers available, but some of the most popular ones include Cura and Slicer.
Once your model is loaded, you’ll need to set a few parameters before slicing.
3. first parameter: layer height
This is the thickness of each individual layer that will be printed. The smaller the layer height, the higher the resolution your print will be.
However, setting a too small layer height can result in your print taking much longer to complete.
A good rule of thumb is to start with a layer height of 0.25mm and adjust from there based on the quality of your print.
4. Second parameter: infill percentage
This is the amount of material that will be used to fill in your interior. A higher infill percentage will result in a stronger print, but will also take longer to print.
A good starting point is 20% infill.
5. last parameter: support structure
This is only necessary if your model has any overhanging parts that would otherwise collapse during printing.
Support structures add additional material underneath these parts to prop them up. They can be removed after printing is complete.
Once you’ve set all of your parameters, you’re ready to slice!
Simply click the “slice” button and your software will generate the layers for your print.
Depending on the size of your model, this process can take anywhere from a few seconds to a few minutes.
Conclusion
Slicing is essential for anyone using a three-dimensional printer.
Without slicing software, you wouldn’t be able to create anything three-dimensional and your printer would be useless.
So, if you have been thinking about getting into this technology, definitely make sure to learn how to slice properly! It will make all the difference in the quality of your prints.
Read More