Removing rafts from 3D prints can be a daunting task, but with the right tools and techniques, you’ll find it’s easier than you expected it to be.
In this blog post, we’ll discuss the best ways to remove rafts from 3D prints quickly and easily, as well as provide tips and tricks to make the process as smooth as possible.
So, whether you’re a beginner or an experienced printer, keep reading for all the information you need on how to remove raft from 3D print.
What Are Rafts and Why Are They Used?
To understand how to remove rafts from 3D prints, it is first essential to know what rafts are and why they are used.
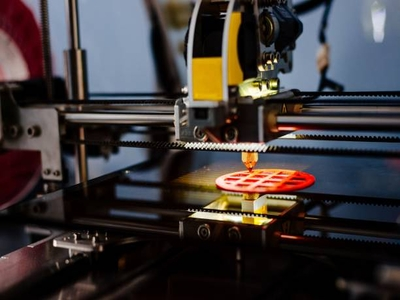
A 3D print raft is a thin layer of material printed underneath the actual object.
Typically, they are made from the same material as the object itself and are easily removed once the print is complete.
Rafts are used for various reasons, but the most common reason is to improve the adhesion of the object to the build plate.
Adhesion is especially important for large or delicate prints that might warp or come loose during printing.
Rafts can also create a smooth bottom surface on an object that would otherwise have a lot of support.
Types of Rafts
There are two main types of rafts:
- Manual
- Automatic
The type of raft you use will depend on your printer, filament, and personal preferences.
Manual Rafts
As the name suggests, manual rafts are manually added to the build plate before printing and are more common for smaller objects.
This can be done using various methods, but the most common is to use tape or glue.
Once the object is printed, the raft can then be peeled away from the print.
Automatic Rafts
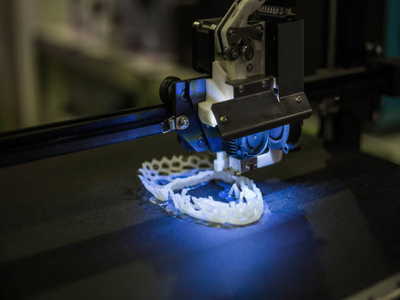
Automatic rafts are generated by the printer itself and are typically made from the same material as the object being printed.
These rafts are often used for large or delicate prints that need extra support during printing.
Once the print is complete, the automatic raft can be removed in much the same way as a manual one.
how to remove raft from 3d print: The Basics
Now that we know what rafts are and why they are used, let’s talk about how to remove them.
Manual and automatic rafts can be removed in various ways, but we will discuss the most common methods here.
Use the Proper Software Settings
The first and most crucial factor in removing your raft is to ensure that you use the proper software settings because you cannot use the default raft settings.
When printing with a raft, it is essential to use an environment that will allow you to remove the raft without damaging the object easily.
- For manual rafts, we recommend using a setting that will generate a gap between the object and the raft.
This can be done in most slicing software by increasing the “raft offset” or “raft separation” setting.
- For automatic rafts, we recommend using an environment that will generate support structures that can be easily removed.
This can be done in most slicing software by enabling the “support” or “generate support” setting.
Read More: Gaps in 3D Printing. See what it takes to fill in gaps!
Use the Right Tools
Once you have the proper software settings, the next step is to make sure you have a clean work surface, plenty of light, and to gather the right tools.
For manual rafts, we recommend using a sharp knife or razor blade.
For automatic rafts, we recommend using pliers or tweezers.
Incorporate Soluble Materials
If you are having trouble removing your raft, you can try incorporating soluble materials into your process.
Soluble materials are materials that can be dissolved in water or another solvent.
For manual rafts, we recommend using tape or glue soluble in water.
For automatic rafts, we recommend using a soluble filament in acetone that will help break down the bond between the object and the raft, making it easier to remove.
Applying Heat
One method to remove both manual and automatic rafts is using heat.
Applying heat in 3D printing to the object will help break down the bond between the printed object and the raft.
This can be done with a heat gun, a hairdryer, or even a simple lighter.
Be careful not to apply too much heat, as this can damage the object.
Picking and Scraping
Once you have the proper software settings and the right tools, the next step is picking and scraping at the raft.
For manual rafts, we recommend using a sharp knife or razor blade.
For automatic rafts, we recommend using pliers or tweezers.
Regardless of which type of raft you have, start by gently picking at the raft’s edge and work your way around until it is completely removed.
If you are having trouble removing the raft, you can try applying heat or incorporating soluble materials into the process.
If All Else Fails
If you have tried all of these methods and are still having trouble removing the raft, you can always try printing without a raft.
This is not recommended for beginners, but it is an option if you are experienced with printing and confident that your object will not need a raft.
Best Tools for Removing Rafts On 3D Prints
As we have discussed, it is essential to have the proper tools when removing rafts from your prints.
Depending on the size and type of raft, you may need one or more of the following for post-processing:
- A Sharp Knife: This is probably the essential tool for removing rafts because a sharp knife will allow you to quickly and easily remove any excess material.
- A Pair of Pliers: Pliers can help grip and pull off larger raft pieces.
- A Heat Gun: A heat gun can be used to soften the material, making it easier to remove.
- Sandpaper: Sandpaper can smooth out any rough edges left behind by the removal process.
We recommend having a toolbox nearby with these tools so they are always on hand.
Because with these tools on hand, you should be able to remove any raft from your prints with ease and will be able to enjoy your prints that much faster!
Check out this video for a quick tutorial on removing rafts:
Conclusion
Each raft removal method has its advantages and disadvantages, but the best way to remove the raft depends on the type of printer you’re using, the type of material you’re printing with, and your personal preferences.
With a bit of practice and patience, you will be able to find the best way to remove the raft from your prints.
Read More