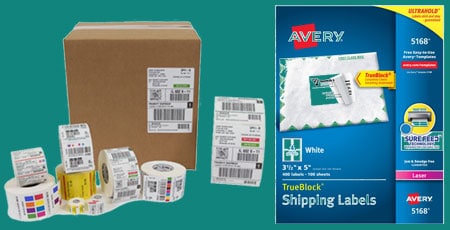
If you are looking to add some flair to your scrapbooks, or want to print astonishing mailing labels, Avery has got your back.
They offer many excellent templates with different patterns that you can use to create any label style you can think of.
All you need to start printing Avery labels is a printer. These days, almost any home printer inkjet, or laser, are more than capable of printing Avery labels.
However, if you do not know the right steps, the printing output might not be enough to satisfy you.
So, if you are wondering how to set your printer to print Avery labels, this article is for you. By the end of this guide, you will be able to print stunning labels easily and tackle any issues that might pop up during the process.
How To Print Avery® Labels Using Printer?

Avery label printing is not a single click and print process. There are many steps to this task such as setting the proper size, resolution, alignment of page, customizing templates, etc. Unless you have some experience with this type of task, there is a chance that your label will come out misaligned.
Don’t worry, it is a common issue for beginners, and over time, your skill with making Avery labels will get better. You could start out with The Avery Design & Print Online software since it works with any web browser application these days. However, we recommend starting with a simpler application, Microsoft Word.
In the following section, we will give you a step-by-step walkthrough on how to print Avery labels using your printer with Microsoft Word or Google Docs.
Step 1
Create a new Microsoft Word Document file and open it. Go to the Mailings tab. It is located between Reference and Review on the top row of the application. Clicking on Mailings will give you another new row with different options like Envelops, Start Mail Merge, Select Recipients, Labels, etc.
Step 2
From the new row, choose the option Labels. You should see a new window pop up that will ask you to select the Avery product number. So, if you have Avery 80 160 labels, search the dropdown menu, and select it.
If you want to have the same writings on all the Labels, you can simply write it in the address space. But if you want to use different texts, choose the New Document Option in the pop-up window.
Step 3
The new document that you created now will be blank. Go to the Layout tab from the top row. Select View Gridlines. Then go to the Labels option from Mailings.
Now you can start filling in the information for the labels one by one. Editing the label is nothing different than editing a normal Doc file.
You can also change the font color, sizes, or alignments in this step.
Step 4
If you want to add pictures or images to your labels, repeat step 3. When you have the gridlines, go to the Insert tab. Choose Pictures, and select the image file from your computer. Once you choose the image, it should be imported to your document file.
However, the sizing or alignment of the photo might not be perfect, and you might want to modify it. To do that, simply right-click on the photo and you should get access to all the options to modify it.
Additionally, you can also choose the Picture Tools tab from the above row and can edit picture effects such as Border, Position, Warp Text, Crop, etc.
When you are happy with the image, go to Mailings > Labels and tick the option Full Page of the Same Label. This would keep your pattern saved for the other labels you want to do in the document.
If you are using the Avery Design & Print Online software, the steps are pretty much the same.
Step 5
You are pretty much done with your labels. Now you just need to go to the File tab and select Print. If you are printing color labels make sure to change the settings to Color printing.
However, before clicking Print, select More Settings which would let you modify the paper size, scale, and quality.
If the Fit to the Page option is selected, you want to change it. Select Fit to Printable Area. This would make sure that the texts and designs come out correctly after printing.
Step 6
Then go to the dropdown menu paper size and select Labels. You also want to uncheck the option, Plain Paper. If there are no Label options, select both Cardstock or Heavyweight option in the printing media settings.
Step 7
Now, all there is left is to do to click print and wait for your printer to print the label. If you followed the steps properly, the label should come out perfectly.
Printing Tips for Avery® Labels

Printing Avery labels the first few times can be quite challenging for a beginner. Even if you know the proper steps that we mentioned above, there are certain preprint procedures that you need to follow to get the best quality output. Some of these tips are generally considered best practices when you are printing Avery labels using your home printer.
Here are a few simple tips that you should keep in mind to ensure your print comes out perfectly.
Use Avery Products
If you want to print Avery labels, you need to use original Avery products. Since non-Avery products are not optimized, they will not work well with Avery templates. This would impact your output quality.
Use The Correct Printer

Although some Avery labels can work with both Inkjet and laser printers, most of the labels work with one or the other variant. You want to make sure you are using the right printer with the right label.
Since inkjet printers and laser printers work differently, a label designed for use with laser printers will not give you a good print. The texts might look faded, or the ink might look smudged.
If you are unsure which printer you have, take a look inside it. Inkjet printers typically use ink cartridges, whereas laser printers work using large toner cartridges.
Print Settings Optimization
Make sure you tweak the print settings in your document file. Here are a few must-do optimizations:
- Set paper size to A4
- Set paper type to Labels, Cardstock, or Heavyweight paper
- Set paper source to the correct feed, rear tray, or manual
- Do not use Fit to Scale
Test Print
Do not start mass printing labels right away. After tweaking the settings, you want to test print a single copy to see if everything is printing as it should. Take a plain sheet of paper and print out the label. Then take your printed sheet and hold it behind the Avery product.
This process would make it easy to check alignment. If the layout is properly aligned, you are ready to start printing all your labels.
On the other hand, if there are issues with alignment, you need to go into your document file and make the correct edits in printing output.
Do Not Reuse The Label
With Avery products, it is recommended to feed the label through the feed tray only once. You should never re-feed the label more than once through the manual or automatic feed tray of your printer.
Manually Adjusting Margins
If you are using the Avery Design & Print online software and struggling to get the margin properly aligned, this tip is for you. For some projects, you might have trouble getting the correct alignment. This is an easy and simple fix.
Simply click the Make a Printer Adjustment option from the menu on the right side of the window. Then use the controls to move the project up, down, left, or right depending on your requirements.
Troubleshooting Different Issues while Printing Avery Labels
By now, you should have a pretty decent hold on how to print Avery labels using a normal printer. In the following section, we will discuss some of the common issues that might pop up during your project and give you probable solutions for these problems.
Print Misalignment
There can be many different reasons why your project is not aligned properly. Make sure you tweak the print settings if you are using
Microsoft Word or use the options to make a printer adjustment for Avery Design & Print software. With downloadable templates, you should be able to adjust the margins quite easily.
Printing Towards a Corner
A common misalignment issue that can happen is your project might be printed towards the corner of the label rather than the correct size. This is caused when the Fit to Page option is selected in the print settings.
Make sure your scaling settings are set up properly. Double-check if the printer is set to print the actual size of the project instead of using Fit to the Page.
Paper Jam
If your Avery labels are getting stuck while printing, there might be two main reasons behind it. Either you are using the wrong feed tray, or the printer rollers are damaged.
In most cases, you want to use the manual feed instead of the automatic tray to print Avery labels.
Some Avery labels come with a special feature called Sure Feed Technology that can drastically reduce the chance of printer jams. Using these labels can be a good idea if your printer jams up frequently.
In addition, make sure your print settings are set up correctly. For stack printing, using the manual feed can ensure that the labels do not stick to each other. This can drastically reduce the chance of a paper jam.
Smearing Or Smudging
After setting up everything and double-checking to make sure, if the ink comes out smudged after printing, it does not feel very good.
Unfortunately, smudging or smearing of ink is related to hardware more than it is related to software. So, if this happens to you, you are using the wrong product.
The most common reason for this problem is if you are using an incompatible label with your printer. If you have an inkjet printer, make sure you are using a label that is specially designed to work with that printer. Some Avery labels are only meant to be used with either inkjet or laser printers.
White Margin Around The Sheet
A slightly rarer issue that you may find while printing Avery labels in your printer is that after printing, there is a blank, white margin around the edges of the sheet. Although it is related to your printer’s capabilities, you can easily work around this issue by tweaking a few settings.
If your printer is unable to print to the edges of the sheet, you can use full bleed to get rid of this problem. Otherwise, you need to use labels that are specifically designed to print to the edges to eliminate this issue.
Final Thoughts
Avery labels are a simple and elegant way to personalize your letters or invitation cards.
Whether you use it for business, or for arts and crafts for personal pleasure, this is a great way to add an extra bit of spice to your prints. The aesthetic flair that it brings to your mailings is hard to beat.
And the best part about it is that it is extremely easy to do if you have a capable home printer, a few handy Avery labels, and a creative mind. And to be honest, all you have to do is to set a nice font, align the texts properly, wrap texts to your liking, and hit print.
We hope our short and sweet article on how to set your printer to print Avery labels could help you get good prints without any issues. Good luck!