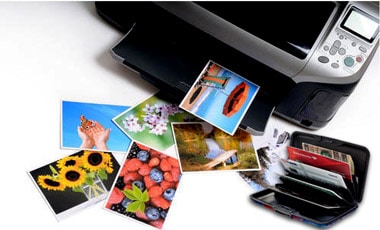
You have just bought a brand new wallet that you had been eyeing on for days. It’s a pretty cool one, with the logo of your favorite brand printed all around on the outside and a generous amount of space on the inside for keeping your valuables.
While all that looks good, you didn’t like the idea of leaving that transparent slot empty. After all, it’s your personal belonging, so it wouldn’t hurt to slide a photo of your own or your beloved one into the slot.
What should you do now? Rummage through the box of old photos and cut your desired photo to wallet size?
Certainly not, because why bother ruining the beauty of a photo when you have a printer? In this guide, we have explained how to print wallet-size photos and fit them in your wallet.
Editing An Image Before Printing
Before you print any image, you need to be sure it has the correct settings, otherwise, your printed image might not meet your expectations. On top of that, there will be a wastage of ink, which is something you will always want to avoid.
There are tons of free and paid image-editing software, like Photoshop, Gimp, and Photopea that you can use to adjust the brightness, contrast, and saturation of an image. Not only that, but you can also add text, filters, and effects to spice up the image.
All you need to do is open the image, play with the settings, add effects if necessary and then save the image to your PC.
If you are using your phone or a tablet for printing an image, you can adjust the settings with the help of a good image-editing app. S
Some notable apps are Photoshop Express, PicsArt Photo Studio, Snapseed, and VSCO.
Printing Wallet Size Photos On Windows 10

If you are using Windows 10 operating system, you can use Print Pictures to print images of any size. Here’s how you can do it.
Printing A Single Photo Or Multiple Photos
Step 1: Open the folder in which you have saved the image for printing.
Step 2: Right-click on the image you want to print. Choose Print from the drop-down list.
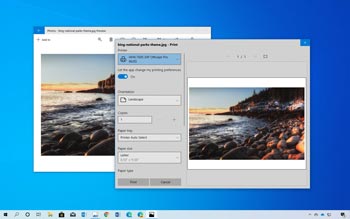
Step 3: The Print Pictures window will appear. It will show you a preview of the selected image along with other options. On the Printer drop-down menu located above, make sure your printer is selected. Also, check if the paper size matches with the one you will be using to print the image. You can also select the image quality.
Step 4: On the right-hand side of the window, you will see a list of different image sizes. Scroll down the list and select Wallet.
Step 5: You will see a preview of the image in wallet size. On the bottom, you will find an option for selecting the number of copies.
The maximum number of copies of an image you can print on a single letter or an A4-sized paper is nine. If you don’t want to make copies, leave the value to 1. Make sure Fit picture to frame is checked.
If you want to print multiple images, select the images you want to print. You can either click on each image while holding the Ctrl key, or drag-select a group of images.
Step 6: Click on the Print button. Your printer should print a wallet-sized image.
Step 7: Carefully cut along the outlines of the printed image and then insert it into the wallet slot.
Related: select the right paper for photo printing.
Printing Wallet Size Photos On Mac

If you’re a Mac user, you can also print photos of custom sizes, including wallet. Here’s how you can do it.
Printing A Single Photo Or Multiple Photos
Step 1: Open the Photos app.
Step 2: Select the image/ images you want to print in wallet size.
If you want to select multiple images, you can either press and hold the Command key and select individual photos, or drag-select a group of images. If you want to make duplicates of the same photo, select the image and then press Command + D.
Click on File and then Print.
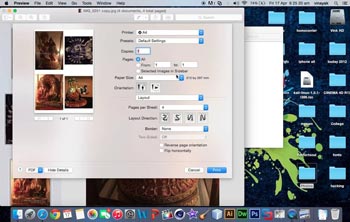
Step 3: A window will appear. It will show you a preview of the selected image/ images on the left, and some settings on the right. Make sure your printer is selected in the print options. Also, check if the right paper size is selected.
Step 4: Click on Custom and then enter the standard wallet dimension in the boxes below.
Step 5: Click on the Print button. Your printer should print wallet-sized image.
Step 6: Carefully cut along the outlines of the printed image and then insert it into the wallet slot.
Also read: Way to print gold on black paper.
Printing Wallet Size Photos From A Phone Or A Tablet

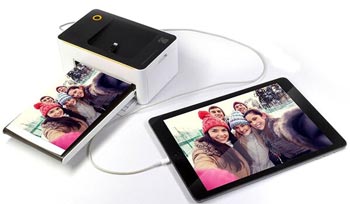
You might not always be on your laptop or have your desired images saved on other devices. If you have a Bluetooth or WiFi-enabled printer at home, you can easily print images from your phone or tablet. Simply follow the steps below.
Printing From An Android Or iOS Device
Step 1: Connect your printer to your phone or tablet.
Step 2: Open the app from your printer’s manufacturer. For example, if you’re using an HP printer, you will need to use the HP Smart App. Keep in mind that any specific printer works best when used with its own app than third-party ones.
If you’re an iOS user and your printer doesn’t have its own app, you can use AirPrint. But before that, you need to make sure the printer is compatible with AirPrint.
Note: Always make sure the app you’re using for printing is up to date.
Step 3: Look for options for printing photos and then select the image you want to print. The app might also let you select multiple images.
Step 4: The app should let you see a preview of the image with settings such as paper size, number of copies, orientation, and image size. If there’s no option for setting the image to wallet size, you will need to take help from a third-party app for resizing the image.
Step 5: Tap on the Print icon or button. Your printer should print a wallet-sized image.
Step 6: Carefully cut along the outlines of the printed image and then insert it into the wallet slot.
Final Word
Owning a printer allows you to print photos conveniently at the comfort of your home, and most importantly, saves the cost of printing from a printing service. You can print your favorite images to any size and use them anywhere you need.
While wallet-size photos are great for displaying your desired picture in your wallet, these also fit well in your scrapbook, journal, or other interesting projects.
Now that you have an idea of how to print wallet size photos, we hope you’ll also be able to print photos of various sizes without scratching your head.