As 3D printing technology becomes more popular, it’s important to learn the lingo.
So, what does infill mean in 3D Printing?
Infill is the section of a 3D printed object that’s filled with material and is used to strengthen the printed object and help you save on materials.
In this blog post, we’ll discuss the different types of infill and what they mean for your 3D prints as there are many different types with their own advantages and disadvantages!
What Does Infill Mean In 3D Printing?

Infill refers to the interior part of a 3D printed object.
This interior structure is essential to the strength and durability of a 3D printed object, as well as its ability to withstand weight and stress.
The purpose of infill is generally twofold:
- to provide structural support
- to save on material costs
Depending on the settings used in the printing process, infill can be made from solid or semi-solid materials that provide additional strength where it’s needed most.
In addition, different materials will have different levels of flexibility and durability depending on their composition.
So, choosing a material with the right characteristics for infill is an important part of the overall printing process.
Ultimately, infill plays an essential role in determining both the quality and function of a 3D printed object.
Therefore, it’s essential for makers, hobbyists, and professionals alike to understand its significance and how best to harness its power.
What are the Different Types of Infill?
There are quite a few types of infill that can be used in your 3D printing process to strengthen your prints.
There are infill patterns that are flexible, ones that are strong, and ones that look pretty. But the one you choose will depend on the needs of your project.
And whichever one you choose, you can play around with the density percentage to change how strong or flexible your project can be.
Lines Infill

The lines infill pattern is one of the most common patterns utilized in 3D printing.
Not only does it tend to be the default pattern, but it doesn’t take much time to print.
If you do decide to utilize this infill pattern, this pattern is ideal for lightweight, small 3D patterns.
Honeycomb Infill
The honeycomb infill pattern looks exactly like it sounds – like the structure that bees build.
Because of its hexagonal structure, it is strong and long-lasting.
This infill pattern is best utilized when needing extra strength, or for heavy, metal-oriented objects.
Grid Infill
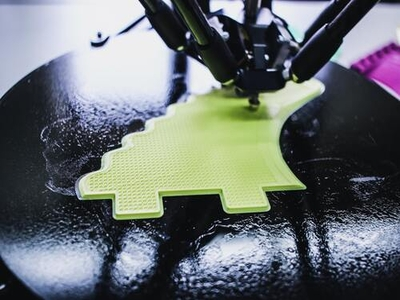
The grid infill pattern consists of two straight lines crossing over one another to create a grid of squares that are strong and leave behind a smooth design.
But keep in mind that because this pattern does utilize a cross-over pattern, your printhead nozzle may clog or your print may face failure.
Don’t let those downsides stop you from using this infill pattern, especially if you are wanting to create a large and/or flat surface.
Triangles Infill
The triangle infill pattern is similar in strength to the grid and honeycomb patterns but consumes more filament and time.
With that being said, the triangle infill pattern is perfect for larger 3D models such as robots, boots, and even bicycles!
Tri-hexagon Infill

The tri-hexagon infill is another infill pattern that provides extra strength to your 3D prints.
However, this infill pattern is complex and thus requires more filament and time than other patterns.
But, due to its strength and longevity, this pattern is ideal for larger models as there is a chance of printing failures when used for small, miniature prints.
Cubic Infill
Unlike the others we have discussed thus far, the cubic infill pattern has built-in air pockets that work as heat insulation and overall strength.
While this pattern does require more filament and time, because it is not very complex, this pattern is ideal for miniatures or prints that are small to medium-sized.
Octet Infill
The octet infill pattern is perfect for 3D miniatures as it is a highly detailed structure that requires a long time to print and more filament than other patterns.
Created with a mix of triangle and cube structures, this pattern does work best with higher layer heights.
Gyroid Infill
The gyroid infill pattern looks like an illusion from above, but that illusion results in increased stability and flexibility in your 3D prints.
If you are wanting to print a flexible object, this pattern is the best option out of all the ones we have discussed.
Concentric Infill

The concentric infill pattern can be described as similar to stadiums, with rings or levels getting bigger the farther away from the center they go.
While you can use this pattern in non-circular prints, this infill pattern works better as concentric circles.
Regardless of which shape you choose to utilize this pattern with, this pattern is flexible and becomes the strongest infill when you increase the density to 100 percent.
Bottom Line
While there are many different types of infill available, the bottom line is that any of these materials can be used to produce high-quality results.
It is important to choose the right type of infill for the job at hand, as well as the printer being used because each type of infill has its own advantages and disadvantages.
No matter what your printing needs may be, there is an infill material that can help you achieve the perfect result.
By taking the time to learn about the different types of infill available, you will be able to make an informed decision about which one is right for your next project.
And with the right infill, you will be able to produce prints that are truly one-of-a-kind, impressive and stunning prints.
Read More