Are you new to 3D printing and looking for an idea of what you need to build your 3D printer setup?
3D printers are amazing machines that create three-dimensional objects from digital files.
If you have just purchased a 3D printer or are thinking about buying one, you may be wondering how to set it up.
We’ll discuss not only the steps involved in setting up your 3D printer, but we’ll also provide some tips on how to make the setup process easier.
Step-by-Step 3D Printer Setup Guide
Setting up a 3D printer is not as difficult as it may seem at first. With a few simple steps, you will be printing 3D objects in no time.
Get Ready
The first thing you need to do is gather all of your materials.
This includes:
- 3D printer
- Power cord
- Computer
- Software needed for 3D printing
You will also need filament and an object to print.
3D Printing Software
The next step is to install free 3D printing software on your computer (or any software of your choosing).
3D software programs allow you to control the 3D printer and create the objects you want to print.
But because there are many different types of 3D printing software available, it is essential to choose one that is compatible with your 3D printer.
3D Design and File Formats
To 3D print an object, you first need a 3D design file that is created using computer-aided design (CAD) software.
These files can be made from scratch or downloaded from an online marketplace such as Shapeways, Thingiverse, or MyMiniFactory.
Many different CAD software programs are available, but some of the most popular ones include Autodesk Fusion 360, TinkerCAD, and SketchUp.
The video below is a great overview of Fusion 360. It gives everything you need to know if you’re a beginner:
Once you have a 3D design file, it needs to be saved in a format that your 3D printer can understand.
The two most common 3D printing file formats are STL and OBJ.
If you’re just getting started with 3D printing, we recommend using the STL file format.
STL files are the most widely used 3D printing file format, and they can be opened and edited in many different CAD software programs.
The OBJ file format is also popular, but it’s not as widely supported as STL files.
Once you have your 3D design file saved in either the STL or OBJ file format, you are ready to 3D print it!
Calibrating a 3D Printer
Calibrating a 3D printer is essential to get good results. Without calibrating your printer, your layers may not print properly.
The manufacturer usually calibrates 3D printers before they are shipped, but it’s still good to double-check the calibration and make any necessary adjustments, as well as calibrate periodically.
There are 3 types of 3D printers: FDM, SLA, and DLP, and they all work by extruding small amounts of melted plastic through nozzles to build an object layer by layer.
SLA 3D printers use a laser to cure liquid resin into solid plastic while DLP 3D printers use an array of LEDs to cure photosensitive resin into solid plastic.
The printing process for each type of 3D printer is slightly different, but all 3D printers follow the same basic steps:
- The 3D design file is created in CAD software
- The 3D design file is saved in STL or OBJ format
- The 3D printer is calibrated (if necessary)
- The 3D design file is loaded into the slicing software
- Slicing software creates GCode instructions for the 3D printer
- GCode instructions are sent to the 3D printer
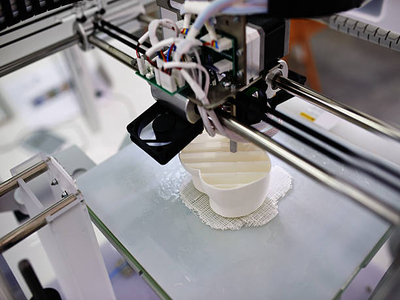
- The 3D printer begins printing the object layer by layer
- Your object is done!
Read More: Types of FDM 3D Printers. Discover the common FDM printer types, what they’re used for, and their pros and cons!
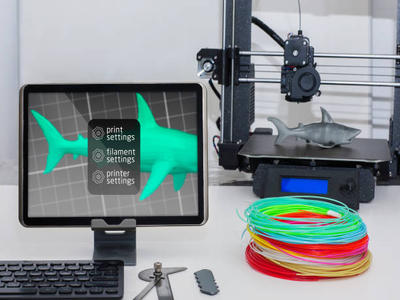
Settings
The 3D printer’s settings menu can be a little daunting, but we’ll go through each option.
Adjust the Z Offset
The first thing you will want to do is adjust the Z offset.
The Z offset is the distance between the nozzle and the build plate. You will need to hone all axis’ and lower the Z-axis until it barely touches the build plate.
Once it is touching, raise the Z-axis back up 0.100mm and enter that value into your slicer under “extruder offset.”
Calibrate Your Extruder
Next, you will want to calibrate your extruder.
This is important because it ensures that your filament is being extruded at the correct rate.
To do this, you will need to heat your extruder and then extrude 100mm of filament.
Once the filament is extruded, measure it with a ruler or caliper to see if it’s 100mm. If it isn’t, you will need to adjust your flow rate in your slicer settings.
Read our related article, What is an Extruder in 3D Printing? to learn the ins and outs of extruders, the various kinds, common problems, and more!
Retraction Distance
The last setting you will want to adjust is your retraction distance.
This is how far back the filament is pulled when the nozzle moves to a new location.
The default value is usually pretty good, but you may need to experiment with different values to get the best results.
First Printing
You can begin printing as soon as your printer has warmed up and fully configured.
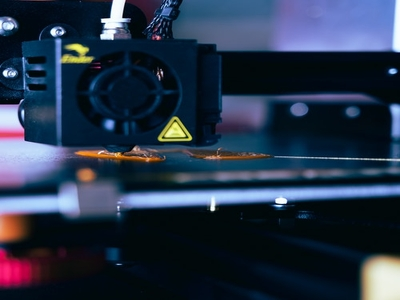
The first layer of the printed model must adhere well to the print bed to prevent the model from coming off the bed, delaminating, or deforming during printing.
Layers are then reprinted at a slower speed than subsequent ones to achieve the recommended good adhesion.
This will allow the plastic to adhere to the bed surface.
Additionally, it is advisable to make the top layer thicker to compensate for any unevenness in the bed or the underlay beneath it.
Tips to Make the 3D Printer Setup Process Easier
It may seem hard at first, but it is not difficult to set up a 3D printer once you get the hang of the process.
You just need to have the proper tools, materials, and knowledge on how to use them.
Here are some tips on 3D printer setup:
- First, gather all the necessary tools and materials. These include a 3D printer, filament, software, and a computer.
- Second, install the 3D printer software on your computer. This will allow you to control the 3D printer and create models.
- Third, connect the 3D printer to your computer using a USB cable.
- Fourth, once the 3D printer setup is connected, calibrated, and settings applied, you can start printing your models.
- Fifth, use 3D printer filament to make the 3D printing process more manageable, smoother, and faster.
You can set up your 3D printer by following these tips. Follow them as many times as you need for the process to become second nature.
Once your 3D printer setup is ready, you will be able to create unique 3D printed models in no time.
With that, it is time to start setting up your 3D printer today!
Conclusion
Now that you have a 3D printer setup, it’s time to print!