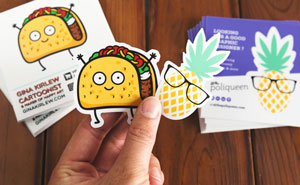
No doubt stickers are great for making your items stand out. Whether it’s a notebook, pouch, water bottle, or laptop, you’ll easily be able to identify your possession in case you see someone else leaving the exact item beside yours.
You might also be tempted to put your favorite custom sticker on the rear window of your car, but as terrifying as it sounds, what if that design gets smudged in the rain?
While there are tons of pre-designed waterproof stickers or custom sticker designing services available, you might not like the idea of digging in your wallet when you can easily make these pieces at home.
That’s what we’re here for! Follow this guide to know how to make waterproof stickers and make your own waterproof stickers in the comfort of your home!
What Makes A Sticker Waterproof?
Not all stickers are waterproof because not all of them are made of waterproof materials. For example, stickers made of paper or cardstock aren’t typically waterproof, but you can make them water-resistant by applying a water-impermeable coating, such as a UV coating.
The drawback of making stickers water-resistant is that they will succumb to moisture at some point, which means the stickers won’t stick well for extended periods of time.
On the other hand, waterproof stickers are more durable. They last a minimum of few years and also withstand when submerged in water. For a sticker to be called truly waterproof, its material, adhesive, and inks should be able to survive immersion for extended periods.
The two of the most common waterproof materials used in stickers are vinyl and BOPP (Biaxially-Oriented Polypropylene). Professional printing services will use either of these materials as well as waterproof adhesives and inks for printing.
Steps To Printing Waterproof Stickers Using A Laser Or An Inkjet Printer
You can use either a laser or an inkjet printer that you already have at home. Although more expensive, laser printers are great for printing waterproof stickers since they use a dry printing process to bond toner powder onto a surface.
On the other hand, inkjet printers use water-based inks, which will cause the printed sticker to smudge when it comes in contact with water. However, you can prevent such a situation from happening by adding an extra layer for protection.
Whichever printer you use, you will need to make sure you use the right paper for the right type of printer, otherwise, there will be irreversible damages. Let’s discuss how you can print waterproof stickers with an inkjet printer.
Step 1: Choose A Waterproof Sticker Paper
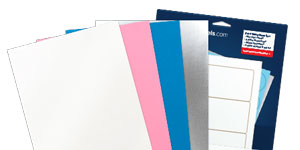
The first thing you need to do is to get a pack of good-quality waterproof sticker papers for your inkjet printer. You will find stationery shops selling letter-sized matte and glossy papers in a pack of 50 or 100. While matte papers are water-resistant, glossy ones offer more vibrancy, so these are ideal for making stickers.
Read More: How to Waterproof a 3D Print. Follow these tips to create watertight prints!
Step 2: Check Your Printer’s Ink Levels
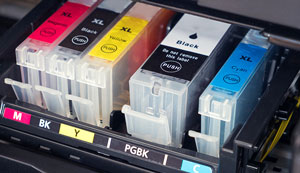
This is a crucial step to follow, especially if you are going to print a bunch of stickers having a wide tonal range. If you print stickers of a specific color, then that corresponding ink cartridge will run out of ink quickly, and you will need to buy the ink cartridge more often.
If you’re planning to print stickers for outdoor use, such as in cars, you can try upgrading to UV-resistant ink. Such inks minimize fading and are also resistant to smudges and scratches.
Related: best printer for sticker
Step 3: Create A Custom Design
Next comes the design process. You can use any app or software you’re comfortable with to create a design. There are tons of image editing apps and software available like PicsArt, Photoshop, and Gimp. Plus, you can use a word processor, such as Microsoft PowerPoint to add text and images.
Before creating any design, be sure to work on a letter-sized document and scale the image size properly. If you are planning to create several stickers, you can make use of the single sheet by arranging the images. When doing that, be sure to leave enough space so that you can cut the stickers out easily.
Step 4: Print A Test Page
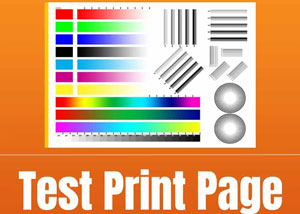
Once you’ve created your design, you’ll want to check how the sticker turns out. As sticker papers can cost around 20 cents per sheet, you might want to try printing on a cheaper plain paper as a test. You can keep using that paper until you’re satisfied with the design quality.
Step 5: Insert The Sticker Paper
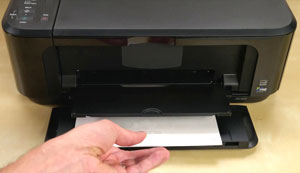
When you’re ready, it’s time to print on sticker paper. If your printer has a single-page document feeder, it’s a good idea to insert sticker paper in that feeder because sticker sheets are thicker than regular ones. It won’t be a problem if you place the sheet in the regular feed as long as you insert one at a time.
Before inserting the sticker paper, you will need to ensure the corners of the paper aren’t bent, otherwise, they will get stuck on the printer’s rollers.
Step 6: Let The Stickers Dry
Once you’re done printing, carefully remove the paper from the tray without touching the printed area. Place it on a flat surface until the ink is completely dry. It is a good idea to let it rest for 24 hours before adding a sealant.
Also read:
Tips to keep you PLA filament dry.
Easy guideline to avoid printer ink from drying out
Step 7: Add A Protective Layer
After the stickers have dried, it’s time to seal the surface. You can use an aerosol sealant spray, like Krylon and Mod Podge as they offer permanent protection of the surface without any smudges.
Besides sealant spray, clear laminating sheets also work well. These sheets have adhesive on one side and are applied just like a sticker. All you need to do is cut out a piece of the laminating sheet a little larger than the actual size of the sticker and then stick it on top of it.
Step 8: Cut The Stickers Out
Cut the stickers you want to use with a sharp scissor or a paper cutter. Remove the backing from the sticker and then attach it to any item you want.
You can also use a sticker cutting machine, such as Cricut for cutting all the stickers.
Final Word
Being able to create your own waterproof stickers gives you a sense of accomplishment as well as enjoyment. Whether you’re printing stickers for labeling your possessions or for your business, it is best to waterproof the stickers so that you can use them for a long time.
And you will need to keep in mind that the more waterproof materials you use for creating the stickers, the better the outcome will be.
On top of that, you will need to use the right items suited for your printer, otherwise, there’ll be a mess!
Hopefully, this guide was able to help you learn how to make waterproof stickers. If it did, then why not share it with your friends?