Whether you’re a hobbyist that would like to print designs onto T-shirts and other objects, or you’re running a printing business, one of the first things you’ll want to learn is how to use sublimation paper.
There are 6 simple steps we will cover in this post on how to use sublimation paper.
We’ll discuss what paper to choose, how to prepare the fabric, as well as how to remove the paper properly.
How Does Sublimation Printing Work?

Before we get into our step-by-step guide, it will help to start by familiarizing yourself with the sublimation printing process.
Essentially, sublimation is the process of turning a solid into a gas.
Which, in this case, will be a unique blend of ink and dye, into a gas by applying extremely hot temperatures.
The sublimation process allows the gaseous dyes to fuse to the fibers of the fabric you are printing on, or any other object with a sublimation-friendly coating applied to it, like a ceramic mug.
For the best results, use press on fabrics that are at least 70% polyester.
If you’re planning to use sublimation printing on a solid object, you’ll want to make sure that it has a polymer coating.
This will allow the gaseous inks to adhere to the coated surface of the object.
When you’re sublimation printing on fabrics, the lower the percentage of polyester in the material, the less vibrant the colors will be in your printed design.
Read More: What Does Sublimated Jersey Mean? Learn all about sublimation printing on jerseys!
How to Use Sublimation Paper: Step-by-Step Guide
Step 1: Choose an Appropriate Sublimation Transfer Paper
If you plan to do any sort of sublimation printing, you’ll have to choose a sublimation paper that meets your specific needs.
This means choosing sheets that will work with your exact inkjet printer.
You’ll also need to choose a sublimation paper that’s large enough for what you plan on printing.
If, for example, you’re printing a small design on a white polyester T-shirt, you can use just about any type of sublimation paper.
On the other hand, if you’re printing a large design on a large polyester sweatshirt, you must make sure the sublimation paper you choose is large enough to accommodate your design and still be the right size to work with your specific printer.
Step 2: Prepare the Fabric You Are Printing On
Naturally, you’ll have to check if the fabric you’re printing on contains a high percentage of polyester.
Once you’ve confirmed that the garment is at least 70% polyester, you can prepare it for printing.
Use a lint roller to remove any debris from the surface you’re about to print on. Even if you can’t see any debris, it could still be there.
This is especially true if you’re printing on a white shirt, as the brighter color makes it more difficult to detect debris.
You can also gently press the shirt with a standard iron, as this will remove any wrinkles that could otherwise impact the final results of your printed design.
You should also wipe down your work area to prevent dirt, dust, or lint from affecting the results.
Next, lay the garment on a pressing mat and place a sheet of plain white printing paper or cardboard inside the shirt.
This will protect the back of the shirt from any ink or dye that could leak through from the sublimation paper during the pressing process.
Read More: What Side of Sublimation Paper to Print On. Here’s what the different sides are best for!
Step 3: Print Your Sublimation Design
Now that your sublimation paper and garment are prepped, you can print your design on the sublimation paper.
Use a sublimation-compatible inkjet printer and an appropriate set of sublimation inks.
While you can purchase specialized sublimation printers, they tend to be fairly expensive.
For small-scale printing jobs, you can convert a standard inkjet printer into a sublimation printer by using sublimation ink cartridges.
Read More: What is Sublimation Ink Used For? Here’s what you need to know about sublimation ink types and uses!
Step 4: Position the Printed Sublimation Paper on Your Garment
This next step can take a bit of practice, so it’s worth taking your time to make sure you do it properly.
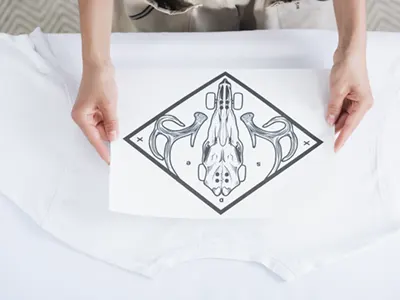
Place your printed sublimation paper exactly where you want the design to end up on your chosen garment.
Use a ruler to center the sublimation design properly. You can also use heat-resistant tape to hold the sublimation transfer paper in the correct position.
Once it’s in position, remember to place a piece of white paper between the front and back of the garment, as this will prevent the ink from leaking through to the other side.
You should also place a sheet of protective paper or butcher paper over the design, as this will help protect the shirt from burning during the transfer process.
It will also prevent dye-sublimation ink from leaking through to your heat press.
Step 5: Heat Press the Sublimation Paper onto Your Chosen Surface
In most cases, you’ll set your heat press to at least 400 degrees Fahrenheit and apply medium to hard pressure for at least 45 seconds.
With that said, the type of sublimation paper you use for your sublimation projects plays a factor in what temperature and amount of pressure you should apply.
Most sublimation paper brands will list basic instructions on the packaging, so it’s always worth checking.
During the pressing phase, the dye sublimation paper and the garment you’re pressing must not be able to move, as this would negatively affect the final results of your printing.
Step 6: Remove the Sublimation Paper
Once the heat press cycle is complete, allow the sublimation paper to cool, which should take about a minute.
From here, you can remove the sublimation paper and reveal your freshly pressed design.
Try to remove the sublimation paper in one quick motion, as this will prevent any residue from spreading to other parts of the garment.
After the sublimation paper has been removed, it’s a good idea to hang up the finished article of clothing. This will allow the ink to set and prevents smudging while it dries.
Read More: How Long Does Sawgrass Sublimation Ink Last? (+ other brands’ shelflife)
Final Words
While it may seem somewhat tricky at first, using sublimation paper is straightforward, which is part of why it is one of the most popular ways to print on T-shirts and other garments, especially amongst beginners.
Just make sure you select the right sublimation paper and ink and use fabrics with at least 70% polyester or solid objects with a polymer coating to get the best colors.