Do you know what sets a particular painting apart?
The realistic look.
Some of the famous paintings are more than hundreds of years old and yet they look exactly the same!
Well, that’s the beauty of oil painting for you!
Due to its slow-drying time and luminous quality, oil painting is more forgiving than any other medium (Water or Acrylic). You can fix mistakes as long as the painting isn’t completely dry and make it look exactly like your imagination!
Want to explore your creative side with oil painting?
We have compiled a list of oil painting supplies in this article that reveals what you might need to get started and what things you can live without!
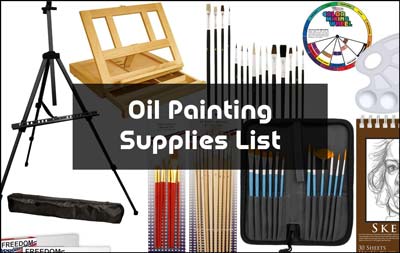
20 Oil Painting Supplies List
Must-Have Painting Supplies
These 3 things are absolutely essential for every painter. If you are just a beginner, then we suggest trying out different brands of these products before settling down for a particular one.
1. Oil Paint

The obvious one!
However, you need to decide which type and color suits you the most! If you just starting out, then stock up some basic shades like Ivory Black, Titanium White, Cadmium Red, Permanent Alizarin Crimson, Ultramarine Blue and Cadmium Yellow.
Tip: Purchase a small starter kit first to see which brand really matches your personality.
2. Brush

Oh! Brushes.
You will need lots and lots of brushes if you are going to take this art seriously! Brushes come in different shapes and sizes.
For instance, you will need a medium-sized fan brush with sharp edges to do the detailing work and a large bristled brush for covering the broad image in the background. For finer details, small round brushes are the best. If you know a little about the uses of watercolor brush pens, you can get creative and make your art look a little more stylish, as we’ve done on our another post.
Tip: If you are on a budget, start out with some natural, student-grade brushes in different sizes and gradually work your way up.
3. Painting Surface/Canvas

You have 2 options in this department: Cardboard and Canvas.
Cardboards are very much economical and take less space to store. However, they might bend and ruin the drawing if you put too much pressure on it by accident.
Stretched Canvas panels are more suitable for this purpose as they keep your painting intact.
Tip: Don’t have any option other than paper? Use a sealant over the surface before painting to prevent it from rotting!
Beginner Oil Painting Supplies
We don’t want the newbies to feel left out in our article!
So here you go, a few things to shop for before getting started!
4. Palette

A palette is basically a surface on which you do the mixing work. The palette can be made of a number of different materials, such as, glass, ceramic, plastic, wood etc.
It’s not easy to clean up a mixing palette afterward. That’s why many artists opt for a glass palette or butcher palette for ease of use. You can use a disposable paper palette too for this purpose.
Tip: If you are planning to use the leftover colors later, purchase an airtight palette that can keep the paint wet and make it easy for you to transport.
5. Linseed Oil/Oil Medium

Do you want to extend the shelf life of your paints?
Linseed oil is the way to go!
Linseed oil or any kind of oil medium helps dilute the paint without altering the original texture. It helps the color to blend in more naturally and give the painting a nice flow around the canvas.
Tip: Don’t go overbroad with this element! Just dip your brush into the medium a little bit before you start mixing different colors together.
6. Varnish

If you are trying to create a realistic picture, then you mush varnish your drawings in the end. Varnishing brings up the vibrancy of an image and offers protection from its surrounding environment.
However, before you apply varnish, make sure the canvas is completely dry.
Tip: Use oil paints that contain quick-drying ingredients to make the process faster.
7. Varnish Brush

Another essential tool in oil painting items is a varnish brush.
A varnish brush is basically a soft brush that has thin, uniform hairs. The brush makes it easy to apply varnish on your painting. It helps you achieve a smoother and more even look than you would’ve gotten otherwise.
Tip: Avoid brushes that are stiff and come with too many bristles. If you are drawing a large picture, then brushes that are 2 to 4 inches wide are the most suitable for you.
8. Palette Knife

Want to apply beautifully textured strokes on your canvas just like professional artists do?
You need a set of palette knives to have that effect!
As oil is a sticky substance, it gets smeared with brush bristles when you try to mix the paints. A palette knife, on the other hand, is great at mixing colors!
You can even apply paint on the canvas with one of these bad boys and create an amazing effect that wouldn’t be possible to achieve with brushes.
Tip: Instead of a single purchase, get a complete set that contains palette knives of different shapes and sizes.
Painting Tools For Professionals
Got everything on the list above?
Time to stock up on the pro collections!
9. Pencil

It’s hard to skip on pencils when it comes to drawing!
Some artists like to sketch on the surface directly to give their drawing a little bit of different texture. Others use it to outline their subject before giving it a final stroke. Either way, a pencil is a great item to add to your oil painting tools set!
Tip: As oil paint is not transparent, it’s better to use soft, broad-tipped pencil, such as graphite ones to outline your drawing perfectly.
10. Gesso

Guess what is gesso?
Let me tell you all about it.
Gesso is basically a liquid primer, which helps prepare your surface before painting on it.
When you pour gesso on your desired canvas, it makes the surface firm enough to hold the paint in a better way. There are different variations to choose from including clear gesso, colored gesso, traditional white gesso, black gesso etc.
Tip: After doing the first layer with gesso, you may find some rough edges on the surface. smoothen it out with sandpaper before moving onto the rest of the process.
11. Quick-Drying Mediums

Just like you need some kind of substance to thin your colors, there are times when you want to thicken it instead.
If the paint is too thin and runny, the color won’t stick properly. That’s when you need a quick-drying medium to thicken it. It keeps the drawings wet for several hours and allows the artist to fix mistakes if needed during that period.
Tip: To make your drawing dry faster, use a box/ceiling fan on low to medium settings to air-dry it.
12. Charcoal

Charcoal is one of the best oil painting materials that can be used as a sketching medium.
A pencil sometimes leaves traces of its imprint on a canvas. A stick of charcoal, on the other hand, produces only a faint outline that gets vanished after the painting is finished!
Tip: If you still have problems removing traces of charcoal outlines, use a soft rag/ kneaded eraser and blow over the material to get rid of it.
Related: Charcoal art supplies list.
13. Eraser

Made a mistake while sketching/outlining your painting?
We all do it, dear!
And that’s what erasers were invented for!
If you are trying to remove charcoal outlines, then kneaded erasers are the most suited options to remove charcoal. Oil paintings, on the other hand, are harder to remove. For the finest result, you have to use medium-smooth grain sandpaper and gesso to erase the previous layer and repaint it.
Tip: Do NOT use paint remover for this purpose. The chemical will destroy your canvas and most probably ruin the image beyond repair.
14. Turpentine/Mineral Spirit

What do you do after you are done using one color?
Clean the brushes for the next one, right?
Unlike watercolor, you can’t clean these brushes with water! Instead, you need to use a thinning solution like turpentine or odorless mineral spirit to get rid of the dirt.
Tip: Turpentine and mineral spirit both are detrimental to our environment and our health. So, make sure to abide by the rules of using solvents. After using, dispose of these materials following the local disposal standard.
Not-So-Essential, But Nice To Have Things
You don’t have to purchase these items right away! But they do make life easier for an oil painter.
15. Newspaper/Rags

Once you are done cleaning off your brushes, they need to be dried properly before getting dipped into the next color.
For that reason, a newspaper or an old rag works the best! A newspaper absorbs liquid even better than fabrics. They come in handy, especially, when you switch between colors and need to dry them off quickly.
Tip: Before starting out a new project, spread some newspaper on the floor to avoid accidental spills.
16. Easel

Okay, it’s not a mandatory one, but it’s pretty useful, especially if you work long hours in a day!
An easel is a frame that’s typically made from wood. It helps hold the artist’s canvas in a convenient way while it’s being painted on.
An easel makes work easier to control your shoulder movement while drawing. It also helps you see the proportions of your work from the correct angle and fix your mistake if necessary.
Tip: Whatever size the easel may be, make sure it’s adjustable to your shoulder height before purchasing.
17. Oil Paint Cleaner

Oil paint cleaner is the easiest way to clean the brushes.
It’s basically a cleaning solution that’s less messy than turpentine or mineral spirit. This type of cleaner also works for acrylic and watercolors.
Tip: Before using this cleaning solution, wipe off the excess paint with a paper towel for the best result.
18. Painting Cloth

An artist is often recognized by his/her messy attire and colorful clothes!
And when we say colorful, it means, it has got all shades of a rainbow on it!
Cut to the chase, you should always have a set of clothes that are used for painting purposes only. It’s better if the cloth is black, that way it won’t look too bad if you spill multiple colors on it in a day!
Tip: You can also use cooking apron as an alternative.
19. Dishwashing Liquid

If you don’t like to use turpentine/ mineral spirit to clean your drawing brushes, then dishwashing liquid is a better option for you.
Liquid detergents contain surfactants that gets rid of oil and dirt by lowering the surface tension. So, when you scrub the brushes with these substances, they become oil-free and return to their previous, clean version!
Tip: You can also use artistic soap that’s made especially for this purpose instead of dishwashing liquid.
20. Plastic Wrap

Done with work?
Still a lot of colors left on the palette?
Well, time to wrap in plastic and keep it in the refrigerator!
Wrapped-up paints can be stored at a cool temperature. And if you do it properly, the colors will stay in great condition for up to 1 week.
Tip: Keep the unused plastic wraps in the fridge instead of drawers. It will make the plastic stop clinging to itself.
Final Words
To set up your very own studio, you will require a lot of other supplies for oil painting.
But, hey! We gave you a pretty decent head-start in this article!
As you continue your journey in the world of oil painting, we hope you discover new techniques to improve yourself.
Till then, keep practicing and enjoying yourself with creative arts, along with some messy and colorful experiments!
Related article that you may like: