Are you new to drawing? Pencil might seem like a good place to start, but if you want to see more strength and better tone in your pictures, you should go for charcoal.
This material also gives you the ability to create bolder images with little effort.
Charcoal offers you an unrivaled range of contrasts, and there’s a whole world of possibilities to the sorts of marks you can make.
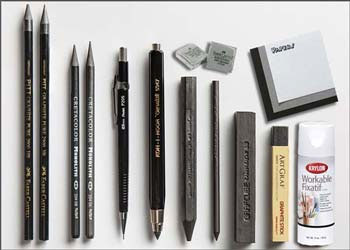
But before you get into drawing with charcoal, there are various items you should get.
Below is my list of the essential charcoal art supplies that both beginners and experts will find useful.
Let’s jump in.
1. Charcoal paper
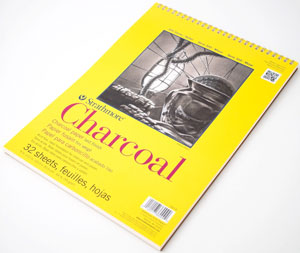
Charcoal happens to have a powdery consistency. For that, if you apply it on smooth paper, such as the regular drawing paper, it will not adhere very well.
That’s why you need special charcoal paper. This paper has a slightly textured surface, which provides charcoal the traction it needs to stay put.
2. Vine charcoal
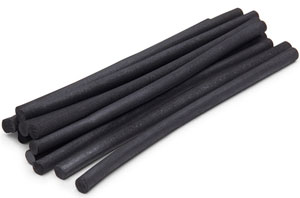
Vine charcoal refers to long, slender charcoal sticks obtained from burning grape vines. These sticks are excellent especially for a beginner because they’re soft and easy to use. Erasing the drawing is also a breeze. If the drawing is light, you can even use your palm to erase it. What a forgiving drawing material!
If you want to be able to make light sketches and make changes to the drawing without a hitch, you’ll find vine charcoal very useful.
Another reason why vine charcoal sticks are a great tool is that they can cover a large area quickly. But this material doesn’t come without downsides. If you know a little about charcoal art supplies, you can get creative and make them look a little more, as we’ve done on another page.
The major problem with it is that it is quite fragile. You can easily mess up a part drawn with vine charcoal just by touching it with your fingers.
That is why it is recommended that you don’t use vine charcoal in more that 20 percent of the drawing. Once you have done the sketch using vine charcoal, use compressed charcoal to finish the drawing.
Another issue is that it has a limit with the level of dark tone it offers. Even if you try pressing harder, you can hardly achieve a nice deep, black tone.
For that, a drawing made exclusively with vine charcoal looks a bit grey and lacks permanence. For a deep black tone and permanence, use compressed charcoal to complete the drawing.
I recommend you use a stick of vine charcoal to tone entire paper. Wipe your hand over the paper to bring in a uniformly smooth grey tone.
That way, any line sketches you draw and erase with your hand will fast disappear into the tone, which is already grey. Your blunders will be very easy to get rid of.
3. Compressed charcoal
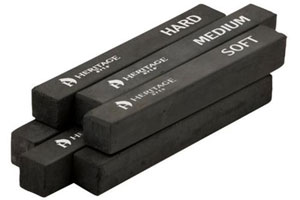
By now, I bet you’ve noted the differences between compressed charcoal and vine charcoal. The main ones are: compressed charcoal is darker and it is permanent. Vine charcoal is greyer and a bit fragile.
Compressed charcoal sticks should be strong and dark. But at the same time, they ought to be adequately soft that when you draw, a soft powder is created.
Can I lighten a line made with compressed charcoal? That’s a question I get a lot. While you can, using an eraser, you got to realize that the area won’t go back to absolute white. Compressed charcoal has great permanence, and as such, lots of commitment is required.
Putting aside the hassle that comes with hiding mistakes, nothing offers a more dramatically dark tone than compressed charcoal. The strength and body of this material is incredible!
To avoid mistakes, lay the foundations (sketch) with vine charcoal. After that, use compressed charcoal to finish the main parts of the drawing.
Remember the 20:80 rule. 20% with vine charcoal, and 80% with compressed charcoal.
4. Charcoal pencil
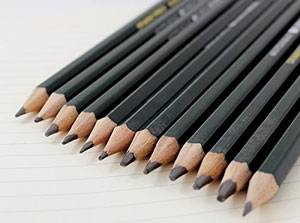
Once you have laid out the fundamental parts of the drawing with vine and compressed charcoal, it is time to articulate small areas and details. You will need charcoal pencil for that.
Charcoal pencils are also very useful for cross-hatching. Cross hatching is the technique where you draw fine lines to give the drawing the illusion of texture or shade.
These pencils are available in varying degrees of hardness, though I find most people prefer the soft ones. Soft charcoal pencils offer flexibility and are easier to use.
A mistake that many people tend to make with charcoal pencils is to use them too early in the drawing. You have to establish the fundamentals of your drawing before you begin working on the details if you want good results.
Another mistake to avoid is to use a manual or electric sharpener to sharpen these pencils. The charcoal core is too weak and will break every time. A razor blade is the best tool for sharpening a charcoal pencil.
5. Fixative
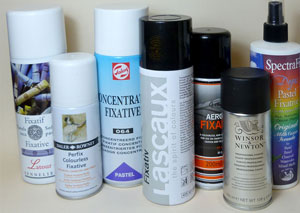
Charcoal art is prone to damage. You can ruin an area you took ages to perfect with something as simple as the touch of a finger. But worry not – fixative is there to help you get around the issue.
This is a product that you spray over the drawing to give it permanence. Once the fixative is applied, you can touch the drawing without the risk of destroying it.
Note: fixative should only be sprayed outdoors, as it contains hazardous chemicals.
There are two types of fixative – the workable type and the permanent type.
The workable fixative lets you work on the image even after spraying the product. On the downside, it doesn’t offer good permanence.
Once applied, the permanent fixative doesn’t let you go back and work on the drawing. But as the name suggests, it offers permanence.
6. Erasers
Erasers are largely seen as a tool for removing the mistakes, but they can be so much more in charcoal drawing.
For instance, if you have toned your paper as I suggested earlier, you can block out dramatic highlights using your eraser. On the grey tone paper, the eraser marks are visible. And that way, you get to use the eraser as some form of white drawing tool or paint.
Here are a few types of erasers you got to have in your collection:
White plastic eraser
White plastic eraser is quite powerful. It’s able to make a bold light passage on a paper tone with vine charcoal. When it comes to blocking out dramatic areas of highlight, the eraser comes in handy.
I have seen folks, particularly students, complaining that the eraser is not working to remove the grey tone. What that means, almost always, is that they’re not exerting enough pressure. You got to apply pressure to the white plastic eraser if you want to remove that vine charcoal grey tone from your paper.
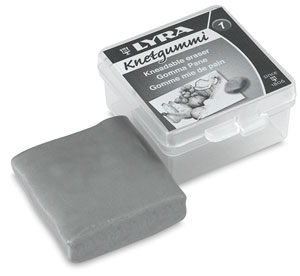
Kneaded eraser
Usually, after drawing, you want to make subtle changes to the image. White plastic erasers are not good for making subtle changes. The suitable too for this purpose is the kneaded eraser.
First off, this eraser is not as stiff or strong as the plastic eraser. So, it will not change the image dramatically. Secondly, you can mold it into whatever shape you want. This versatility means you can make any mark with it.
Another way in which you can apply the kneaded eraser is to smudge your drawing. Smudging with the fingers might seem like a good idea, but that will make the image over-smooth, giving it a sort of fake look.
The kneaded eraser gives you more control, so that you end up with a variety of textures as you look to.
Eraser stick
The eraser stick is like the charcoal pencil – it is for the finishing touches. This tool is not to be used too soon, as it can lead you to pay more attention to the details before you’re dome with the fundamental parts.
I like to encourage learners to use the eraser stick hand in hand with the charcoal pencil. The former should help you correct the mistakes you make with the latter. Or just to introduce highlights with it.
While buying, look for an eraser stick with a tip that is not too wide. You want something that can produce adequately thin lines. Here is our recommended charcoal eraser for expert user.
Conclusion
Before I go, I have to remind you – layering and mixing is extremely important in art. For instance, if you only use a vine charcoal stick, you will likely come up with a drawing that looks washed, grey, and dull.
Try to incorporate all the supplies I have written about – the vine charcoal, compressed charcoal, charcoal pencil, and the erasers. The vine and compressed charcoal will help you create difference levels of boldness and tone.
The charcoal pencil and erasers, on the other hand, will come in helpful when adding effects such as cross hatching that make your image livelier.
Did I forget to include something you deem essential for charcoal art? Please share your thoughts in the comments.
Related: