If you’re looking for a detailed guide on how to change filament on Ender 3, you’ve come to the right place.
In this blog post, we’ll discuss each step of the process in detail so you can change your filament with ease, as well as provide tips and tricks that will help make the process smoother.
How to Change Filament On Ender 3
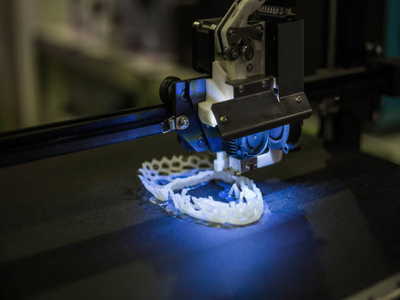
If you own an Ender 3 Pro and want to know how to change the filament, then this guide is for you.
The process is quite simple and only takes a few minutes to complete.
Before you start, make sure that you have the following items:
- A new spool of filament (the same color or a different color)
- A pair of pliers
- Scissors
Step 1: Turn Your Ender 3 Printer On
To change the filament on your Ender 3, you need to start by heating the printer, which can be done by turning it on by pressing the power button on the control box.
Step 2: Wait For The Hot End To Heat Up
Next, you need to wait for the hot end to heat up.
The hot end is the part of the printer that melts the filament so that it can be extruded through the nozzle.
For PLA filament, the recommended temperature is 210°C or 410°F.
You can check and adjust the temperature of your hot end by looking at the display on your control box as it shows both the current temperature and target temperature.
Read our related article on the Best PLA Brand. We tested the top PLA filaments and here are our favorites!
Step 3: Choose The Correct Temperature Settings
If you are using a different type of filament, then you will need to adjust the temperature settings.
For example, if you use ABS filament, the recommended temperature is 100°C or 212°F.
We tried the Best ABS Filament in this guide, so be sure to check it out if you’re not sure which brand to use!
Step 4: Load The New Spool Of Filament
Once the hot end is heated up to the correct temperature, it is time to load in the new filament spool.
- To do this, cut off the end of the filament using a pair of scissors.
- Next, use a pair of pliers to loosen the tensioner knob on your Ender 3.
- When loosened, pull out the old filament spool and insert the new one.
- Then, wind some of the new filament around the feeder tube.
Once you have a good amount wrapped around, tighten the tensioner knob back down.
Step 5: Extrude The New Filament
Now that the new filament is loaded, it is time to extrude it through the hot end.
- To do this, go to your control box and select the extrude option.
- Then, use the dial to choose how much filament you want to extrude. A good starting point is 100mm.
- Once you have chosen your setting, press the “extrude” button and wait for the new filament to start coming out of the nozzle.
If everything is working correctly, you should see a continuous stream of filament coming out of the nozzle.
If not, check to ensure that the filament is loaded correctly and that the tensioner knob is tightened down.
Step 6: Clean Up Any Filament Jams
If you see that the filament is not extruding correctly, it is likely because there is a jam somewhere.
The most common cause of jams is old, dried-out filament.
- To fix this, simply remove the old spool of filament and replace it with a new one.
- If you are still having trouble, you can try cleaning out the nozzle with a needle or something similar.
Just be careful not to damage the nozzle in the process.
Step 7: Enjoy Your New Filament!
Once you have successfully changed the filament on your Ender 3, it is time to enjoy your new color!
How to Load Filament into Ender 3
Loading filament is similar but not the same as changing the filament as it does not require the hot end to be heated up.
- Turn off your printer and unplug the power cord.
- Remove the top cover by unscrewing the four screws that hold it.
- Locate your spool of filament and cut off a piece of filament that is about as long as your arm.
- Insert the end of the filament into the hole at the top of the extruder assembly.
- Push down on the lever above the hole to secure the filament.
- Plugin your power cord and turn on your printer.
- Load your file onto an SD card, insert it into your printer, and start printing.
Watch this video on how to load filament into the Ender 3 for a visual guide:
Tips When Changing Filament On Ender 3
It’s a good idea to change your filament when you notice any of the following:
- Your prints are coming out inconsistently
- The colors of your prints are off
- The quality of your prints is decreasing
Here are some tips on how to change filament on Ender 3:
- Make sure you have the correct type of filament for your printer. Not all filaments are created equal, and using the wrong type can damage your printer.
- Always use a clean, dry spool of filament. If your filament is wet or dirty, it can cause problems with your print quality.
- When changing colors, purge all of the old colors from the extruder before loading in the new color by simply heating the extruder and letting it run for a few minutes.
- Be careful not to overtighten the filament when loading it into the printer. If the filament is too tight, it can cause problems with feeding and lead to jams.
- Once you have loaded in the new filament, perform a test print to make sure that everything is working correctly.
By following these tips, you should be able to change your filament without any issues successfully.
BEGINNERS: Be sure to read up on common 3D printing problems and how to solve them before you get started to avoid printing disasters.
FAQs
How Do I Know When To Change The Filament?
If you notice that your prints are coming out stringy, or with gaps in your print, it is time to change the filament.
What Type Of Filament Should I Use?
It depends on what you are printing.
PLA works well for most prints, but you can use ABS if you want a more durable print.
Can I Reuse The Filament?
You can reuse the filament, but it will degrade over time, so it is not recommended.
How Do I Store My Filament?
You should store your filament in an airtight container. You can also put it in the fridge to extend its lifespan.
Conclusion
Changing the filament on your Ender 3 is a simple process.
By following the above steps, you will be able to do it with ease and without any issues – just make sure to have all tools and materials ready beforehand!
Now that you know how to change filament on Ender 3, thanks for reading, and good luck!
READ MORE