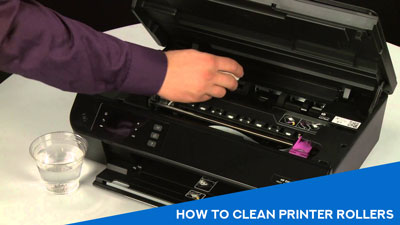
Notice the documents coming out of your printer with unusual lines and/or marks? Are these lines more like dust or dirt than ink?
Or is the paper coming out too slow or too harshly? Then it probably means you need to clean your printer rollers.
While you may experience tons of issues with the cartridges, toners, and other parts of a printer – rollers may also stop working correctly.
This often happens when too much dust or dirt accumulates in the rollers, so they either function too slowly or start leaving marks on the papers you print.
Sometimes, they may even wrinkle the sheets, messing up the whole print and making you waste time and money.
Both consequences can be pretty annoying. That’s why we’re going to help you learn how to clean printer rollers and fix this. Here’s a small guide explaining how to proceed, depending on the printer you have.
How to Clean Inkjet Printer Rollers?
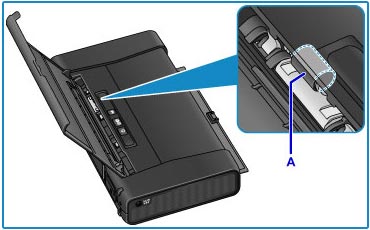
An inkjet printer is more complicated than a laser printer, and the rollers enter into this complexity. You’re likely to find it a little tricky if you aren’t familiar with printers. But still, this is not something to be afraid about.
What You’ll Need
- 2 lint-free cloths
- Distilled water
- Alcohol (1-2 tablespoons)
- Cotton swab (Optional)
Once you have these items, then you can proceed to:
Prepare the Printer
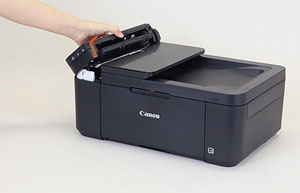
Make sure to turn off the printer before starting. Disconnect it from power as well to make sure it doesn’t turn on mid-cleaning.
Now take the printer to a place where you can work freely, and you can take the printer apart without losing the parts. It should also have enough light so you can see everything with ease. Then, you’re ready to start.
Locate & Remove the Rollers
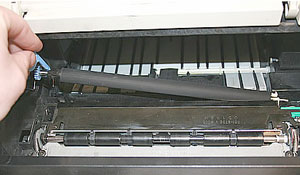
The rollers on an inkjet printer are usually located inside the printer. So you’ll have to take it apart starting from the paper tray.
Here’s how:
- Typically, the rollers on an inkjet are inside the machine directly where the paper comes in. This could be either on the upper part or bottom part. Place the front of the printer facing upwards so you can look for the roller more easily.
- Once you find them, you’ll have to take them off. Do this by rotating the roller with care. They should come off with little pressure.
- Some models don’t have removable rollers. In this case, you’ll have to clean them directly from inside the machine by rotating them.
Make sure to follow the instructions/manual of the printer before doing this. Otherwise, you may end up taking it apart for no reason or taking out the wrong components.
Prepare the Cloth
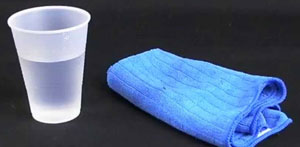
Once you’ve found the rollers and taken them out (or not), you need to prepare the lint-free cloth for cleaning them.
Do this:
- Grab a small bowl and pour about half a cup of distilled water. Then pour a tablespoon or two of alcohol.
- Damp the cloth inside the mix. You don’t want it to be dripping wet (especially if you’re cleaning from inside the printer). So take away some of the wetness by squeezing it.
With the lint-free cloth ready, you can start cleaning the rollers.
Clean the Rollers
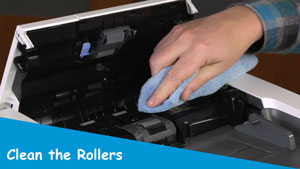
Cleaning the rollers is the easy part. Here’s how:
- Start wiping the rollers all around with the cloth. Make sure to remove as much debris as possible. If one side of the cloth gets too dirty, then fold it and keep cleaning.
- In case you’re cleaning inside the printer, then you need to rotate the rollers with one hand and clean with the other. Be sure to be careful and not squeeze the cloth.
The rollers must look like new. With the solution (distilled water and alcohol), they should look neat afterward.
Wipe the Rollers Dry
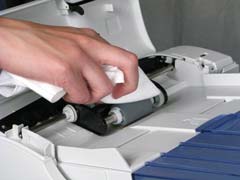
After cleaning them, you should dry them.
, they start dripping inside the printer, and you don’t want that.
- Grab the other lint-free cloth and wipe the rollers free. If they’re inside the printer, do the same but trying not to drip moisture around.
- Let them dry completely before installing them back into the printer. Don’t re-assemble the printer either.
Renovate the Rollers (Optional)
In case the rollers look worn off and don’t glide much, it probably means you need to rejuvenate them. That’s what the renovating product was for, to give them the glide and slickness back.
Here’s how to use it:
- Grab the cotton swab and softly damp it on the rejuvenation product. Make sure it is not dripping.
- Now grab the roller and pass the swab across it. Cover the entire surface with the cotton swab, wiping the product around. Then let it dry.
This should give the rollers their smoothness back. Test them up once they dry up. Your inkjet printer should be ready to use problem-free now.
How to Clean Laser Printer Rollers?
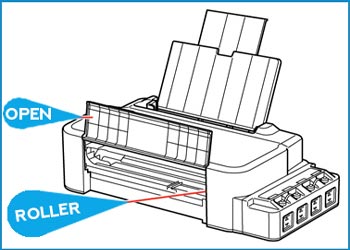
As you know, laser printers work slightly differently than inkjet models because they have their rollers closer to the tray. At the same time, the rollers are different, so it is crucial to understand how you need to proceed accordingly.
What You’ll Need
- A lint-free cloth
- Alcohol
- Cotton swab
Only a few items are necessary. Here’s how to proceed:
Prepare the Printer
Once again, turn the printer off completely. Disconnect it from the power outlet and the PC. Take it outside and make sure it is a place with enough lightning and space so you can work freely without interruptions.
Then you can proceed to take the printer’s tray, front door, and toner cartridge out. This will help you find the rollers more easily.
Find the Rollers
The rollers on a laser printer are not hard to find. Yet, you may want some help taking it out.
Here’s how you can do this:
- Start by locating exactly where the rollers are. You’ll probably find them close to where the paper tray was. If you can’t find them there, you will have to open the access panel.
- The access panel is easy to open by hand. Just make a little pull and take it off gently. Use a screwdriver if necessary.
- Once you’ve located the rollers, you need to take them out. They are probably attached to the printer via a simple mechanism. So you will need to only lift them up from the machine with care, and that’s it.
- In some cases, you will have to unclip the rollers manually from its sides. This could be a little more complicated. Yet, you shouldn’t last more than just a few seconds doing it.
- If you can’t find a way to take them out, or they are just fixed – then leave them.
After taking them out (or not), lay them on a flat and clean surface. They’re ready to be cleaned.
Prepare the Swab
You can now prepare the cotton swab and the alcohol to clean the rollers. Here’s how:
- Pour one spoon of alcohol on a small cup. Then gently soak the cotton swab in it.
- The swab shouldn’t be soaking wet in alcohol but only slightly moist. Otherwise, you could end up making a mess. Especially if the rollers are fixed into the printer, you want the swab to be only slightly moist.
- Now you can proceed to clean them.
Clean the Rollers
Cleaning the rollers takes little to no time, but we recommend doing it as deep as possible. Follow these steps:
- Rub the swab softly on the rollers. Make sure to cover their entire surface and get rid of any sign of dust, dirt, or ink.
- Do not put them back inside the machine once you’ve cleaned them. Leave them dry before reinstalling them.
If you install them while they’re still wet, then they’re likely to catch dust again or simply drip alcohol on the printer, which can damage it.
Dry with a Cloth
You can finish by drying the rollers with the lint-free cloth.
- Wipe the rollers with the cloth softly. Get rid of any remain of dust, debris, or alcohol.
- Leave them out for a few more minutes then reinstall them on your printer.
- Put everything back up and test that the printer works. If it does, then you’ve successfully cleaned your laser printer rollers.
4 Tips for Cleaning Printer Rollers Correctly
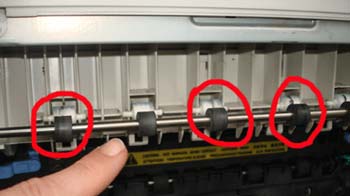
We want you to clean the printer rollers as well as possible without causing any damage. The following tips will help you do that:
1. Always Unplug
Never start taking the printer apart without first disconnecting it entirely from its power source and computer. If you leave it connected, then you may cause permanent damage that cleaning the rollers alone won’t fix. In the best-case scenario, you will damage yourself.
2. Be Careful When Handling
Whether it is the printer or the rollers, be sure to handle everything with total care. Remember that you will probably need to tweak and take apart a few components from the printer. If you do, then be as careful as possible not to cause damage to a single thing.
That’s why we always recommend finding an ample enough space where you can clean the rollers comfortably & easily from.
3. Don’t Overuse Alcohol
Another super important thing to remember is that alcohol can be somewhat corrosive. If you use too much, then it may end up dripping inside the machine or simply eating up the rubber on the rollers.
And you surely don’t want that to happen. If you decide to use anything else apart from alcohol, then take this tip even more seriously. Strong chemicals could cause damage to the rollers and other parts of the printers, so be extra careful.
4. Don’t Use Machines
Finally, don’t use air guns or heat guns to dry the rollers. Also, avoid using any type of compressor close to the printer. The best and only way to clean the rollers is to take them out gently and clean them individually. Otherwise, you may cause permanent damage to the printer.
Clean the Printer Rollers Now!
So, did you learn how to clean printer rollers? We hope so!
While this may look like a simple thing to do, it may take you a little more time and effort than you expect. But it’s totally worth it if you want your printer to start functioning normally again.
Therefore, don’t hesitate to follow these steps and make it happen. Don’t let your printer rollers malfunction again!
Other Printer Accessories That You May Like: