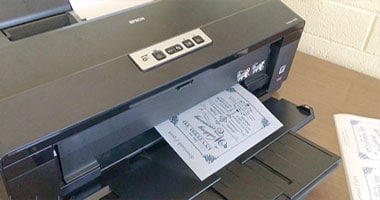
Vellum, a paper, or to be precise, a plastic that you can pour all your creativity into. Starting from making invitation or greeting cards to scrapbooking or tracing designs, vellum paper can be a great material to have for arts and crafts.
If you have got the printer right, you can use it to DIY an interesting card!
But printing on the vellum can be a bit tricky! Why? Because, the paper is light, non-porous, and delicate. One wrong step can ruin the whole project.
However, you can avoid the issues by knowing some simple steps. Once you learn how to print on vellum, making customized cards would be a piece of cake.
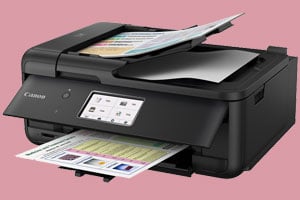
Ideal Printers To Print On Vellum
There are 2 kinds of printers that are ideal to print on vellum papers, inkjet and laser printer. However, both have their positive and negative sides.
1. Inkjet Printer
Pros:
- Inkjet device comes with lots of settings. Although the names will be different, you may get at least one setting that will work well with vellum paper. Just play around for some time and you will get it.
- It’s very easy to use.
Cons:
- Inkjet printer typically leaves wet ink, so it’s going to take a lot of time for the ink to dry fully. Moreover, vellum paper may not absorb the ink quickly since it has a plastic sort of surface. As a result, the drying time would be longer.
- You have to be very patient to get perfect prints on vellum paper without any smudge or streak.
2. Laser Printer
Pros:
- Prints of laser printer on vellum paper dry instantly since it leaves dry ink itself. So, the printer ensures free of smudge most of the time.
- Laser printer uses less ink for printing so you will find them quite cost-effective.
Cons:
- The ink may tend to flake off. In case it happens, the flakes may stick to the parts of the card and ruin it. However, it varies in models.
- Slightly hard to operate if you don’t read instructions.
Primary Step- Familiarize With The Printer
Use, test and get to know your machine. Before you start the printing steps, it’s important to familiarize yourself with the inks and out of the printer you will use.
It includes printing settings, trays, compatible paper types, weights, drivers and so on. Read the manual carefully. You should find it with the printer. Once you know everything well, you can easily tweak the settings and make it work.
How To Print On Vellum With Inkjet Printer- The Steps
Step 1- Set The Paper Horizontally
Set your vellum paper horizontally. The inkjet printer shouldn’t make any extra sheet land over the previous one. This way, the liquid ink of the printer will get more time to dry completely on the paper. It will be better if you print the paper separately instead of doing it in batches.
Step 2- Select Your Paper Parameters
Open the printer setup dialog box. Look for the paper parameters. The dialog section varies in devices so figure out where you can make the adjustments.
Step 3- Select Your Paper Type
Picking different types of paper can make a big difference. Go through the list of paper types that your printer supports. You can find the list in the dialog box around a drop-down menu.
Make sure the paper used in inkjet printer is absorbent. As vellum is not porous, you must load a good amount of ink in your printer so it can decide how much ink it needs to lay down on vellum.
In this stage, you may need to experiment with different options to get the ideal paper choice. You can select options between plain paper or rough cardstock since it will help you avoid ink running. I’d suggest you pick rough cardstock.
Some printers also have options like Fine art, transparency and glossy photo paper. Although the transparency option uses the least ink among these, your prints will not be bold and crisp.
Step 4- Select Color Management
Now look for color management section in the dialog box. In the settings, you may find options like regular, best, draft, fast, or highest quality. Opt for the Regular.
Keep in mind that you should use as little ink as possible on vellums. It helps make the wet ink dry faster without any smudges. This is what regular setting does.
The highest quality option makes the printer use more ink and end up slowing down the print head. As for the draft, it uses less ink but can make the prints look blurry which can affect the quality.
Step 5- Short Dry Time (Optional)
A very useful setting but you won’t find it in all the models. So, make sure to check if your printer has this feature. The short dry time option allows you to choose dry time. That means the printer will use less ink and the quality won’t still be affected.
You can check the availability of this option if you go to File>Print>Printer Properties>Maintenance>Custom Settings>Ink Drying Wait Time.
Step 6- Command Print
Now, give your printer the printing command if everything is set properly. You can get the vellum paper printed right after that.
Wait for a day or around 24 hours for the ink to dry completely. You can use the paper next day.
How To Print On Vellum With Laser Printer- The Steps
Set Your Paper Horizontally
It’s important to set the vellum paper horizontally. It helps ink dry fully on the paper before another one lands over it. I’d suggest you print the vellum papers separately for better results.
Select Your Paper Parameters
Similar to inkjet again, look for paper parameters in the setup dialog box to make necessary adjustments. As the settings vary in devices, so you must check which one works the best.
Select Your Paper Type
Now go through the paper types your printer includes. You may find the list around a top-down menu. Make sure to pick the most resistant or thickest option. Some of the common options you may find are thick, rough or cardstock.
Try the settings out and print your paper a few times to find the ideal one.
However, don’t pick the transparency option. Although many users may suggest it, you won’t find it appropriate for vellum printing due to its ‘cool setting’.
Select Print Quality
Check the print quality area in the dialog box to select one from the list. The options include contrast, brightness, or saturation.
Set different percentages each time with these controls and run a few trials. They mainly affect the clarity, brightness, and warmth of your print. Plus, the controls determine how dark you can set the printer to before toning. Toning refers to the unprinted area of your print becoming gray because of excessive toner.
Select Paper Thickness
Look for a thinner paper setting and adjust it to that. This will help you prevent some common issues like stray ink flakes, wrinkles and jams.
Select Paper Weight
Many laser printers let you adjust weight. If your printer has this feature, then set it to lighter one so it accommodates lighter vellums and helps with print coverage, feed, recognition or paper jamming issues.
Note that, selecting the heavy setting makes the printer apply more heat and pressure as it slows down the whole printing process.
Typically, the printer should support paper weighing from 16 lbs. bond to 53 lbs. bond or more.
Command Print
Finally, go ahead with the print option once you have correctly selected all the necessary options. It shouldn’t take much time to get the vellum printed.
Now, wait for at least 24 hours to let it dry. Use it the next day.
Tips For When Printing On Vellum Paper
- Allow a 1-inch margin around the text so that your printer rollers can grab the paper with ease.
- To avoid the print from smearing, make sure you increase spacing between the letters.
- Make sure to print a small batch of vellum and give it a brake. Frequent uses of printer make it hot and affect the quality.
- You can use a heat gun and embossing powder to help the ink dry quickly.
Solve Common Issues Of Printer And Vellum
Jamming, smearing and smudging are the common issues that you may face while printing on a vellum paper. You can use the following methods to try and get rid of them.
1. Experiment With Paper Tray
Some trays tend to take paper on a roundabout path that may result in such issues. If you face any, try replacing your paper tray. Select one that will feed the papers just straight.
2. Let The Printer Cool Down
If the issues still linger after replacing the tray, then there’s a high chance that your printer is overheated. Often, when the printer gets hot due to frequent use, it affects the picture quality and printer performance. So, give it a break. Wait for the printer to cool down and then use it.
3. Flip The Paper
Turn your vellum or flip it if nothing works. Then put it into the printer. It may sound weird but the truth is that paper’s grain texture can affect the image quality. You may not see it with your eyes but the printer can sense it. Thus, flipping or turning the paper can often solve those common problems.
As you’re trying to find the right side of the paper, check if it has a less shiny side. Some papers of certain manufacturers may not have the same texture on both sides which can affect the printing quality. So, if one of your paper’s surfaces is less shiny, use it to avoid the issues.
Final Words
It can be challenging to print on vellum paper with laser or inkjet printers. Those common issues, the tricky nature of the paper or multiple settings of printer make it tougher. If you aren’t careful enough, it may make the entire paper messy.
But this is just for the initial stage. Once you pass the trial and error phase, things would get easy.
Yes, the long drying time is annoying. But it would be great if you divert your mind to other creative stuff instead of waiting for the ink to dry. This way, you won’t suffer.
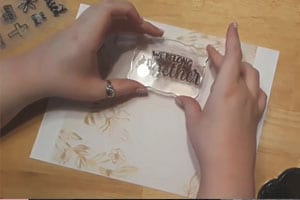
Now that you know the easiest way to print on vellum, follow the instructions and prepare to make a beautiful card today!