If you’re looking for a creative gift idea, putting a photo on clothing is perfect.
In this post, you’ll learn how to put a printed picture on a shirt and the methods for displaying a photograph on a T-shirt.
How to Put a printed Picture on a Shirt – 4 Methods
Using a printer or a vinyl cut-out is just one example, and a heat press, Cricut machine, or even an iron are all methods of how to put a printed picture on a shirt.
You can have a lot of fun learning how to transfer photographs onto fabric, and we will discuss 4 easy methods to learn how to put a printed picture on a shirt.
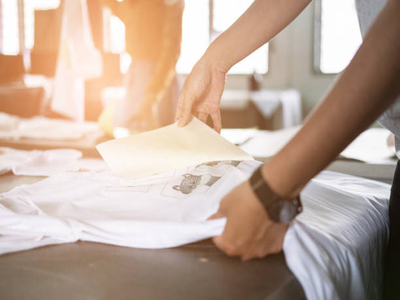
1. With Transfer Paper
Iron-on transfers are the most common and simplest technique to apply pictures onto fabric using a home printer.
This procedure just requires an inkjet photo printer that can print on transfer paper.
You’ll also need transfer paper, which you can get at most craft stores or online.
However, transfer paper isn’t all the same.
You will need to find out what kind of ink your paper can take and which materials it will stick to, such as cotton but not polyester.
You should also consider the color of the shirt and the design to see how well they go together.
A high level of contrast is preferable, so you may want to use a dark pattern on a light shirt or a light-colored, white, or extremely brightly colored design on a dark shirt.
2. Without Transfer Paper
How can you transfer pictures to fabric without transfer paper? Plastic wrap may be a good option!
This easy technique does not provide the sharp, clear image that transfer paper provides, but it’s a fun challenge to attempt.
Steps to Using Plastic Wrap
- Choose an image from your computer or print it on shining magazine paper if you’re using an inkjet printer.
- Take the photo and place it face up on a section of plastic wrap that is big enough to cover the print. Fold over any excess wrap neatly so that it lies on the back of the print.
- Then, iron your shirt to smooth out any bumps or lumps on the surface.
- Set the print face (plastic-wrapped) down on top of the shirt.
- After that, cover the photo with paper. You can buy parchment paper at any grocery store, but you may also try using an open brown paper bag.
- Turn the steam function on your iron to “off” and place it on medium heat.
- Cover the parchment paper with plastic wrap and place it on a dinner plate.
- Microwave for 3 to 4 minutes, moving in smooth, slow strokes.
- Allow the shirt to cool for 2 minutes before peeling away the paper.
This is a simple, quick, and inexpensive approach to learning how to put a printed picture on a shirt.
However, it does not give long-lasting effects.
To preserve the transferred picture, you will want to hand wash your shirt.
The video below illustrates how much fun (and easy) it can be to make DIY t-shirts without transfer paper:
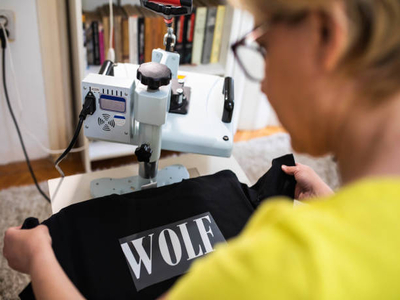
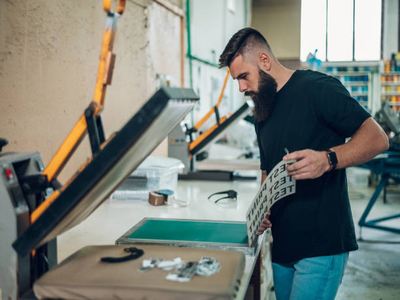
3. Heat Press
Heat press transfers are some of the most permanent, professional picture transfers available.
You will immediately notice a difference if you choose this option.
A heat press is a printer/copier that has flatbed and hinged lids like a scanner or copier.
The lid presses down and the heat timer is set, resulting in even and concentrated heat to apply images.
There is a catch, of course.
You will need to invest in the equipment and learn how to use it, which has its advantages and disadvantages.
Therefore, if you just want to make one or two shirts, this approach may not be for you.
A heat press, on the other hand, is required if you want to establish a t-shirt printing company.
Check out our T-Shirt Business Checklist to learn how to kickstart your business!
Using A Heat Press
You can use a heat press to print on several types of clothing.
- You may apply a printed picture to transfer paper and then heat press it.
- A Cricut or similar device can be used to cut out a vinyl design and seal the vinyl to a shirt with a heat press.
- However, if you’re designing for a screen printer, that isn’t always the case.
- You can even use it to apply iron-on decals to a t-shirt!
Read More: Remove Graphic From Shirt. Here’s how to remove screen printing graphics from t-shirts for reapplication!
4. Parchment Paper
Parchment paper is another option and is available in two different finishes: matte and glossy.
Some artists like to use shiny-side down parchment paper on top of transfer paper for a longer-lasting result.
Steps for Parchment Paper
To accomplish this, follow all of the steps in the section above for transferring paper.
Then, instead of performing step 6 as described above, perform these additional steps:
- Cover the 3 sides of your document with parchment, then trim a piece that will cover your design and have an inch of overlap on all sides.
- On top of the transfer paper, place the parchment paper shiny-side down.
- Remove the iron from its position, turn off the steam function, and set it on a burner or in an oven preheated to medium heat.
- For 1 to 2 minutes, slide the iron back and forth across the dull side of the parchment paper.
- Allow the paper to cool for a minute before removing the parchment paper and transferring it.
PRO TIP: Cover the design with a blank sheet of parchment paper, iron it, and then remove it after washing the shirt.
Final Thoughts
These are four ways to learn how to put a printed picture on a shirt.
You may print your picture on transfer paper and iron it on a shirt, or use a heat press or screen printer for professional-looking images.
Remember that many online retailers also offer the option of creating your clothing with a photo or design printed on it.