Polymers are composed of smaller units known as monomers and are made up of larger molecules.
Those monomers combine together during a chemical reaction called polymerization to make lengthy chains when they join together.
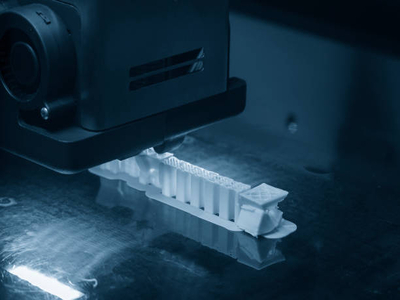
UV resin is a type of polymer that is cured with ultraviolet light, making it very durable and resistant to a variety of chemicals, solvents, and physical forces.
UV resin, however, is not impervious to every danger, and in this post, we will discuss how to repair issues and stickiness.
Why UV resin is Sticky
Occasionally, users encounter an adhesive outer layer on the cured resin because UV resin is sticky!
This can happen for a variety of reasons.
Contaminants
It might be caused by contaminants in the monomers used to create the resin.
If the monomers are not absolutely pure, they will not react properly during polymerization, resulting in a sticky end product.
UV Exposure
Second, too much UV exposure while curing may cause the resin to cure rapidly on the surface, leaving the underneath soft and sticky.
Improper Storage
Finally, improper storage or handling of UV resin can also result in a sticky surface.
If the resin is stored in an airtight container with no airflow, moisture can accumulate inside and cause the cured resin to become sticky.
Fortunately, this issue is typically easy to fix by sanding.
Newly Manufactured
When UV resin is fully cured, it may seem sticky to the touch since it still contains leftover manufacturing solvents.
However, the leftovers evaporate over time and generally go away after 24 hours of curing.
This process is referred to as oxygen inhibition and occurs when the presence of oxygen in the air reacts with the free radicals produced during UV resin curing.
The reaction produces new, less reactive molecules, which is why the polymer chains do not crosslink to give a lower degree of curing or a “tacky” feeling.
The good news is that as long as you give it time, this tackiness will go away on its own!
When you are designing a product, one of the first things you should think about is texture.
This is especially true for cosmetics since they must conform to specific aesthetic criteria.
However, regardless of how much time and effort you put into finding the ideal texture, you may wind up with a sticky result.
Although this sticky issue is often fixable, there are times when this gooey texture remains, indicating that your product has additional defects.
Ultra Violet (UV) Resin
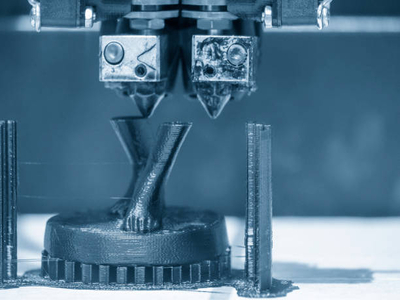
UV resins are a type of polymer that differs from other types of epoxy in a number of important ways.
First, rather than relying on chemical reactions, UV resins cure using ultraviolet light.
This makes it quick and easy to apply, but it also necessitates the use of expensive specialized equipment for curing.
Furthermore, the resin is typically more expensive due to its unusual chemical formula and the particular curing technique used to solidify it.
However, UV resins have several benefits that make them well worth the extra money.
For one thing, as long as they are cured properly, they are quite strong and long-lasting after being exposed to elements such as wind and rain.
UV resins can also be used in a variety of ways because they harden swiftly and uniformly, without the need for precise mixing or other labor-intensive procedures.
It can be used to make dentures, bottle closures and clamps, dental crowns, industrial materials for bonding or coating, and jewelry components, to name a few examples.
While there are some drawbacks to utilizing this sort of polymer resin, the benefits make it an excellent choice for anyone looking for a strong and flexible adhesive for various practical or aesthetic purposes.
How to Cure UV Resin
UV resin is cured using a two-step approach, and while curing resin necessitates experience and expertise, it is only frightening at first.
The following materials are required to cure your resin project properly:
- Resin
- UV light
- A level surface
- Wax paper (or anything that will protect your working surface)
- Gloves
- A small paintbrush (optional)
- A stir stick (both optional).
The first stage, known as the “initiating” or “beginning” phase, involves using a UV light to induce polymerization.
It is then applied directly over your UV resin deployment area.
After you have gathered all of your supplies, you can begin by measuring out an equal amount of resin in each cup.
When weighing and mixing the resin, make sure you are using gloves and then stir well before pouring into its own container each cup of blended resin.
Once you learn how to cure UV resin, you can use the helpful video below to learn how to avoid blemishes on a cured UV resin surface:
UV Resin Pros and Cons

Advantages
- UV resin hardens quickly when exposed to UV (ultraviolet) light, making it an excellent choice for quick repairs or drawing complex patterns.
In comparison with a two-part resin, UV resin cures in a few seconds to minutes.
- It is also non-toxic and does not require the use of corrosive chemicals, making it safe to handle.
- Additionally, resin components do not need to be combined, saving time during the manufacturing process.
Because the mixed ingredients do not need to gel and adhere to the surface area after being infused, work can continue uninterrupted and at speed.
Disadvantages
- In comparison to ordinary epoxy resin, UV resin is typically more expensive.
- You will need to work with small layers, curing every 3 mm layer applied while working with UV resin.
- Because certain direct sunshine at times is not sufficient, you will need a specific UV light lamp to cure it.
Articles You Might Want to Read
- How to Get Printer Ink Off Hands (SIMPLE Ways)
- BuildTak vs PEI: Which Build Plate Should Choose?
- How to Use a Heat Press Machine (EASY-Follow Guide)
- Best Printer for Notary Signing Agents
- Best Edible Printers for Cakes: Top Picks 2023