For those who don’t hold a strong interest in garments or crafting, buttons may seem like a mundane component in the attire. They may only think about the impact of other more prominent parts of the outfit like its fabric, cuts, patterns, etc.
However, the ones who have got a keen eye for details or those who are used to being perfectionists, know the power of buttons in any clothing. These pieces may be small in size but their presence can enhance an outfit’s appeal by several degrees.
So if you are not getting the right button for your clothing project anywhere, maybe it’s time to make some of your own? Let us help you with your attempt at this by showing you a comprehensive button making supplies list!
Button Making Supplies And Their Uses
1. Cutters or Hole Punch
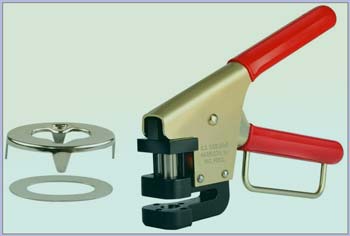
When you have the design printed out in paper, all you need for the next step is a cutter or hole punch tool.
A hole punch is a compact handheld tool used for cutting out designs for smaller buttons sized at ¼ to 1 inch.
The cutters come in different shapes and sizes to accommodate the versatility of your creativity. Usually, you can find them in circular, rectangular and triangular shapes.
Their structures also largely vary which reflects in their price points. The more expensive ones are heavier but also a lot more efficient, while the cheaper ones save budget but demand more effort. However, if you are new to all these, going for the more affordable one would be a wiser investment.
Uses:
This is required so that you can cut out the printed designs flawlessly and efficiently. Completing the cutting step carefully is very important since any extra space will show up on the button and ruin its appeal.
Using the hole punch tool will allow you to cut for many buttons in a row because of its convenient design. You can also cut multiple buttons in one go! They are usually more expensive than cutters. DIYers use the cutters mostly for larger buttons and sometimes even badges.
2. Shells
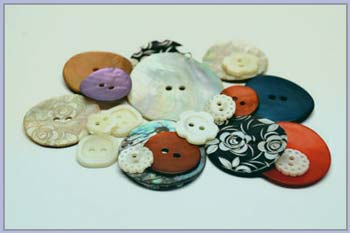
The shells are what your customers will see sewed in on the fabric.
Of course, there might be many other varieties of components used for the most prominent part of a button.
However, the metal shells with pin-back are the most common choice among them. Especially the enthusiasts who are just starting to get the hang of this process, prefer using these durable shells first.
They come in many sizes ranging from less than an inch to 3.5 inches. You can get them in bulk so that you don’t run out of the materials too fast. A pack of shells can include 500 to 5000 pieces!
Apart from the metal ones, shell or shell buttons may come in other high-end materials like pearl. It got its name from the ancient days where literal shells were carved to develop into buttons. These shells would come from mussels, abalone, trochus and other genuine sea-based species.
Uses:
This is the surface that becomes conspicuous to them when they are checking out the outfit or accessory. It usually comes with a polished surface so that the potential customers are drawn to its design or glamor in no time.
3. Mylar
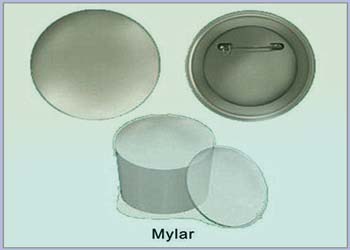
For most DIYers, the term Mylar represents a transparent polyester sheet that keeps the button shiny. However, it is actually the name of a particular brand of such sheets produced by the company called DuPont Teijin Films. The sheets themselves are made from a material named Polyethylene Terephthalate or PET.
Because of its high demand and widespread popularity, the brand name has become synonymous with the material! So you will often see Mylar being listed as one of the key components in a button making supply kit.
Uses:
All your buttons would probably look very dull and lose their charm without the Mylar layer. You will need to apply it over the printed design covering the front shell of your button before pressing it. This way, the thin Mylar sheet will be applied right over the button’s surface as soon as it is done.
Along with making the buttons more appealing, this sheet also protects it from wear and tear. The durable plastic material protects it from bad weather as well. Thus, you can get an upgrade in both appearance and functionality!
4. Collets
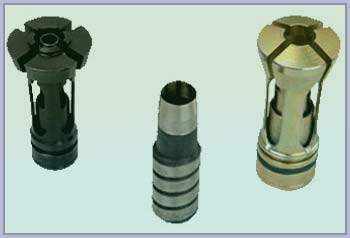
Collets are the hollow frame-like structures that keep one or both shells of your button in place. Similar to the shells, these pieces can be made from any material. However, the most common material used for this purpose is metal since they are exceptionally durable.
Since the collets are applied to the edges of each shell, it obviously needs to be at a size which fits those shells. That is why you will find them in different dimensions. The most commonly used one among them measures at around an inch.
Most collets are shaped like rings since circular buttons are the most popular choices. However, there are other shapes available too in order to meet your creative needs.
Uses:
You need collets to make the buttons since this component binds the front shell and the back one together. They keep these two pieces and all other parts of your button in their desired position. Because of collets, you don’t see the buttons falling apart from your clothing too often.
Locking Tools
These tools can vary a lot depending on your preferences or project requirements. There are many ways to fasten a button including spring lock pins, adhesive magnets, long prong back and medallion.
All of these options bring in different aesthetic values and styling opportunities for both the wearer and the seamstress. As a result, you can expand your customer base by offering them the freedom of choosing their favorite mechanism among these.
Uses:
As the name suggests, locking tools lock your buttons in their specified location on the garment. They also make the button-down function possible for outfits which need to join two separate parts.
Conclusion
Making buttons with your own designs is quite exciting! You don’t have to wait for another company or individual to provide you with these anymore. It gives you both the freedom of creativity and the control over this entire process.
As a result, you can experiment more with your ideas and see which one turns out to be the most effective one!
We hope that our inclusive list of button making supplies has given you a good idea of which components to invest in for your first DIY button project!
Remember to get a reliable designing software as well to make a digital version of your unique idea. Printing them out beforehand is essential to ensure a smooth sail for your crafting adventure!
Our More Resources Reviews: