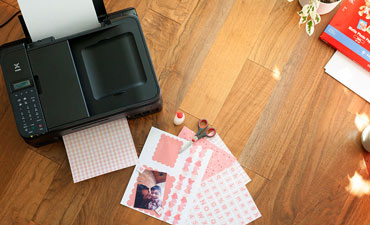
Do you want to apply a particular design to your walls, floors, windows, or vehicles? Are you a DIY enthusiast and want to decorate something with customized images?
Then the best thing you can do is make your own decals. A decal is basically a special paper with which you will be able to transfer images and designs to another surface.
There are numerous ways of making decals, amongst which using an inkjet printer is one of the most effective methods.
That being said, creating decals with an inkjet printer can be a little tricky. It has to be done precisely to get a satisfactory outcome.
We have prepared a detailed article to help you understand how to make decals with inkjet printer. Read on to know more.
Steps For Making Decals With Inkjet Printer
Making decals with an inkjet printer is not only about printing images on a special page, but you will have to do it in the right way to transfer the designs. It needs to be done with utmost caution to get the best possible outcome.
Let’s take a look at all the steps you will need to follow to make decals using your inkjet printer.
1. Get The Materials
To make decals with an inkjet printer, you will need numerous items along with a printer.
Keeping the items near you while making the decal will make the process less time-consuming, and you won’t have to go through the hassle of finding the equipment each time you will need it.
Check out the items you will need to make decals without any issues.
- Graphics Tablet
A graphics tablet is a tablet-like device in which you can use your finger or a stylus to make designs or edit images. Since you are making decals, a graphics tablet will make the whole process simpler for you. However, this item is not mandatory; you can use a photo editor instead of this unit.
- Inkjet Printer
Well, since you want to make decals with an inkjet printer, the printer is a must-have item.
The unit which you should buy depends on your personal preference and budget. However, you should get an inkjet printer for Water Slide Decal that at least has the capability to provide high-quality printouts.
- Waterslide Transfer Paper
This is a special paper with which you can easily transfer images and designs to any surface. The best part of using these papers is that you can transfer images to glass, cups, plates, or vessels. Also, it’s very durable.
You can purchase the waterslide papers from any of your local office supply stores or online stores.
- Acrylic spray
- Craft knife
- Paper towels
- Bowl of water
- Digital design file
2. Turn On Your Inkjet Printer
Now that you have gathered all the necessary materials, it is time for you to switch on the printer and connect it properly to your PC.
3. Scan Or Download The Image
If you want to make a decal from a picture on the internet, then you should download the file containing the design. You can also edit the image after downloading using any editing software.
Scan the image using a scanner if you want to create a decal from a physical picture or design.
Besides, if you are skilled at graphics designing, you can create your own design by drawing them on any photo editing or graphic designing platform.
Tips:
- Make sure to download the image in the best quality available to have the most acceptable outcome.
- You should download or scan the image with a resolution of at least 300 dpi, and the recommended resolution is 600 dpi.
4. Insert The Decal Waterslide Transfer Paper Into Your Printer
You should insert the waterslide paper into the paper tray of the printer. The coated part should face the inkjet head. Then, set the printer to the transfer paper manufacturer’s preferred settings.
5. Print Out The Decal Sheet Onto Decal Waterslide Transfer Paper
Using the inkjet printer, print the design or the image onto decal waterslide transfer paper.
6. Spray Acrylic Sealant
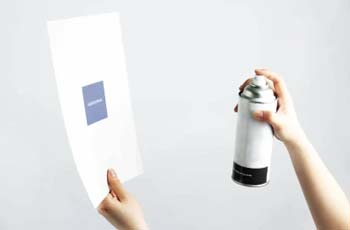
After printing out the digital design onto the waterslide transfer paper, spray it with two coats of acrylic sealant.
If the papers’ manufacturer recommends spraying more than two coats of acrylic acid, then make sure to let each coat fully dry before applying the next.
7. Dip The Transfer Paper In Water
Fill a bowl with two inches of water and place the decal in it. Allow the decal to soak for the time specified on the box. It will be ready to be removed from the water when you will be able to slip it back and forth between your fingertips.
8. Cut Out The Decal
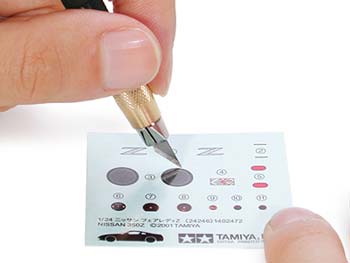
Keep the printout flat on a magazine using one arm. Use the other arm to cut the decal with an anti-cutter or a scissor.
If the transfer paper is clear or transparent, leave a border of a quarter-inch around the four sides of the decal. However, don’t do it when the transfer paper is white.
Related: Vinyl monogram machine for cutting your decals.
Cautionary Tips For Making Decals With Inkjet Printer
- When loading the waterslide paper on the printer, coated part should face the inkjet head.
- When spraying multiple layers of acrylic sealant on the waterslide paper, allow the first layer to dry up entirely before applying the next coat.
- Ensure that all the ink cartridges of your printer are empty before printing your decals as one color running out will result in the other colors messing up, ruining your whole print.
- Choose the best quality of printer and paper/media within your budget for highest quality print output.
- Ensure that the media of your choice is compatible with your inkjet printer.
- When spraying your printed media with the acrylic spray if the colors seem to bleed, allow the printout to dry out for around 24 hours before you resume spraying the sealant or laminate it.
- Before you get printing, choose the “print on glossy paper” setting to get the best image quality printed on your decals.
- Waterslide decals need to be securely sealed with ample amount of sealant for enhanced durability of the ink so settle for no less than three coats. The more the merrier!
- Spraying should be done before you cut out your decal as or else, it will reach the edges, resulting in ineffective transfers.
- When cutting out your decals, try using special cutting tools for the most flawless cutouts.
Final Words
Making a decal using an inkjet printer, you can enjoy the versatility of decal waterslide transfer papers. With these transfer papers, you can apply a decal to any surface strutting from candles to walls.
Hopefully, after reading our article, you have understood how to make decals with inkjet printer. The process of making decals using an inkjet printer might seem a little daunting at first, but trust us, it becomes pretty simple after a couple of tries.