
The best way to print out images or stickers with a transparent background is to use clear sticker paper. It’s better than printing transparency film, and you are getting an adhesive backing.
This type of sheet allows you to print stickers with a transparent back. Also, you can peel off this part. Printing is easy. A good inkjet printer should be enough.
Custom stickers printed on clear sticker paper blend seamlessly into any surface. No matter what method you use to cut these labels — by hand, by machine, or by scanning and cutting your own labels — you will always get brilliant results.
Most household inkjet printers can print clear sticker papers with water-based inks. No special equipment is needed, and the best thing about it is that it works on any software.
As a raw product, the film looks like a white sheet of paper with a glossy finish. Printing is done in this area. Matte surfaces on the back only protect the adhesive.
To print on the glossy side of the paper, you feed the paper into the printer. Many printer drivers provide transparent or clear film settings that you can choose from.
How To Print On Clear Sticker Papers Using Inkjet Printers
Perhaps you’re wondering how you can create clear stickers with your trusty printing device at home. Good news. You can print transparent stickers on most regular printers. Just make sure to follow these steps.
Step 1
We need to determine first whether our printer is a laser or an inkjet printer. Do this first before we can get down to the rest of the steps of printing on clear labels.
Step 2
Each uses different technologies, and they are both compatible with specific stickers. The instruction manual or the front panel of your device should be able to identify the type of printer you own.
Step 3
You should now look for a clear self-adhesive sticker paper that will work with your printer after finding its type. The type of sticker paper you require for your printer may vary depending on its specifications. In some cases, however, self-adhesive transparent paper works well with some brands.
Step 4
Choosing the right shapes is also important. Various shapes of transparent printable stickers are available, including rectangles and circles. It is best to use rectangle sheets for stickers on book covers.
Step 5
Get ready to celebrate! Depending on your printing surface and imaging requirements, you must the set image or the document you wish to print correctly. When editing an image, the image should be resized and positioned on the paper to fit your design.
Step 6
In addition to printing documents, you can also print out labels and envelope addresses. The transparent adhesive paper should have clear instructions that describe how to space and size the contents properly.
Step 7
It is recommended that the driver has an option for clear film, which is needed if you are printing on clear sticker paper. Furthermore, it will ensure that your prints are clear and crisp.
Step 8
You can now print clear stickers at home. Click on the Print icon on the program’s menu bar or on the toolbar of the application to select print from the file menu.
Step 9
Examine the printer after the prints arrive to determine if it could print on clear, translucent adhesive papers. If you overlooked it the first time, be sure to pay attention this time and repeat the previous step.
Step 10
After you have printed your stickers, let them dry. If your stickers aren’t made of specially shaped transparent adhesive paper, they can be cut out once they are dry using a pair of scissors.
Printing On Clear Sticker Paper – Cricut Maker Method
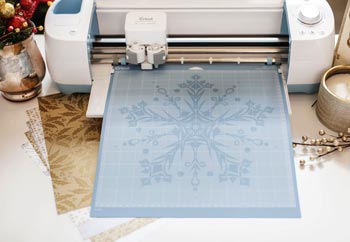
You can easily make stickers by printing and cutting. Here is an easy tutorial on how to create Christmas stickers on clear sticker papers.
Things You Will Need:
- Clear sticker paper sheets.
- Any inkjet printer.
- Cricut maker.
Creating A Design
- Specify the shape of the background. Circles are a common shape for stickers. Click on the Shapes panel and choose a circle.
- Replace the color with white. Because normal home printers do not print white, the shape in itself will not print, but it will be cut.
- The sticker’s size. A sheet of 8.5″ x 11″ stickers will hold twelve two-inch stickers.
- With two inches of width, two inches of height will be automatically set. Hit “enter” after entering a “2” for the width.
- Choose an image. The image set “Christmas wreath” is the one you need for this holiday sticker.
- The image will be selected when you click “Insert Images”. You can search for and be able to add all images at once if you wish.
- The wreath should be sized to fit the image. It doesn’t have to be centered perfectly right now.
- Feel free to create a sentiment. Enter “Happy Holidays” in the image search bar. Click “Insert Image.”.
- Despite having a shadow layer, this image is hidden by default. To reveal an eye, click it. Make the sticker fit the image by resizing it.
- Personalize the message. To create a text box, click the Text button. Choose a font, and then type your text.
- You will need to select your images and text. You shouldn’t select the circle. It’s easy to select layers in the layers panel while holding down the shift key. Click Group once the images and text have been selected.
- Then, click Align and Center on all the layers. Click Flatten while all layers are still selected. Multilayer images are flattened into single-layered printable images by flattening them.
- Now that the image has been flattened, it can be printed and then cut. Simply click the Make It button.
Finalizing The Design For Printing
At this point, you will need to make more copies of the project. Click the upward arrow until you reach 12. Then click Apply. Hit the Continue button next.
After clicking Send to Printer, a new window will appear. The project should be printed and placed on the mat. Decide how you want the cut to be made. My paper of choice was the Cricut Clear Printable Sticker Paper.
There are a few words you need to know about clear printable sticker paper. Paper with the shiny side up is used for printing the images. Even though it seems wrong, it actually works. Press the “Go” button after loading the mat into the machine.
Releasing The Adhesive Backing
To release the sticker, bend the backing backward. It would be great to seal envelopes or affix them to gifts with these stickers. Also, you can print stickers on full-sheet paper. In my case, I found that using the “Adhesive Foil” setting left the backing relatively intact.
Steps For Printing On Transparent Sheets
If you can’t find clear sticker papers, your next option is to print on transparent sheets. Here is how.
- You will need to go into your printer’s options and select the appropriate paper type for transparency sheets.
- Printing ink on photo paper differs from printing on paper, so the printer needs to know this.
- It’s important to realize that the photo part won’t be as dense as a normal printed photo. It will resemble a slide rather than a printed photo.
- An SVG shape can be created for cutting out a picture from a photograph. To make the shape, you need to scan the photo.
- When you run the cutting mat through the cutter, you will need to align the shape on the mat with the photo.
- In addition, you will need the right tools like cutter software, photoshop, and other similar programs, as well as a cutter machine.
- There’s no point in doing this much work, given the amount of work involved. In the long run, however, this can be beneficial if you need multiple copies.
Tips To Getting High-Quality, Bright/Saturated Color
So far, Online Label offers some of the best and high-quality clear sticker papers. They offer weatherproof matte, matte clear, gloss papers that deliver outstanding results.
Now, if you are new to this, you will get across a fairly common problem, and this is not getting the desired color output. For first-time users, the prints won’t be vibrant. This is fairly common if you use their regular matte sticker paper.
There is nothing wrong with the paper. All you have to do is adjust the print settings. Make sure to choose the plain paper setting on your inkjet printer for your clear sticker paper type, as this one always seems to print the best.
This way, you will get decently high-quality colors every time you print on a standard matte sticker paper. Alternatively, silhouette matte sticker paper to get wonderful colors and quality, but they can be quite pricey.
Final Words
In terms of cost-effectiveness and versatility, stickers are among the best marketing tools. It’s no secret. Well-placed stickers are better than online PPC ads and can easily get more attention.
The added benefit of stickers, like most print media, is that they have a long shelf life and cost only once. If you peel off the bumper sticker on the back of your car, the message will remain until the print fades, or the sticker is removed.
Also read: